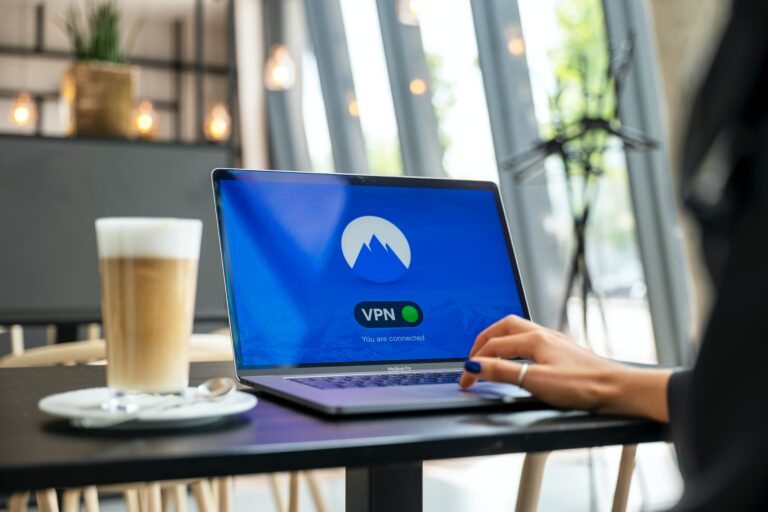
哪些文件共享服务在中国行得通? 十一月 28, 2023九月 10, 2023 作者 ǞǞǞ 简介 与许多其他国家相比,中国的互联网审查和限制更为严格,因此访问和使用某些文件共享服务可能具有挑战性。其中一项限制就是 "中国长城防火墙"。 该系统的正式名称为 "金盾工程",是中国政府实施的一套全面的互联网审查和监控系统。其目的是控制和限制对特定外国网站、社交媒体平台和在线服务的访问。当局认为这些网站、平台和服务具有政治敏感性、不适当或违背共产党的意识形态。 防火墙采用多种技术组合,包括 DNS 过滤、IP 阻断和深度数据包检查,以监控和过滤互联网流量。防火墙还采用大量人工审查员来人工审查和阻止内容。 高达 5 GB 的免费文件共享 不需要注册 开始与中国共享文件 在中国实现文件共享的合法与正当方法 有一些合法和正当的方法可以帮助在中国之间共享文件。下面介绍几种: 1.虚拟专用网络(VPN): 使用政府批准的 VPN 服务可以提供安全的加密连接,访问被封锁的网站。确保选择符合当地法律法规的 VPN 服务。 2.Shadowsocks: 这是一个开源加密代理项目,也可用于绕过互联网审查。 3.Tor 浏览器 Tor 网络通过一系列由志愿者运营的服务器路由连接,可以帮助你访问被屏蔽的内容。 4.代理服务器: 代理服务器可以充当设备和互联网之间的中介,让您访问被屏蔽的内容。 5.移动数据: 有时,使用移动数据而不是 Wi-Fi 可以绕过某些限制。 6.法律 VPN 服务: 中国有政府批准的 VPN 服务,允许您访问国际网站。 7.当地替代方案: 中国经常有与国际流行网站和服务相对应的本地网站和服务。例如,用微博代替 Twitter,用优酷代替 YouTube。 8.卫星互联网: 在某些情况下,卫星互联网可以绕过当地的审查制度,但这是一个更加复杂和昂贵的解决方案。 8.文件共享服务: 有一些文件共享解决方案不受各种限制的阻碍。使用它们与中国共享文件与与其他国家的用户共享文件没有什么不同。Filemail 就是这样一种运行良好的解决方案。 使用 VPN 是绕过防火墙的常用方法,让我们进一步了解一下。 使用 VPN 规避文件共享到中国时受到的限制 中国用户经常使用虚拟专用网络(VPN)。VPN 在用户的设备和中国境外的服务器之间创建一个加密隧道,有效绕过审查制度,允许访问被封锁的网站和服务。 通过连接 VPN,用户有可能克服这些限制,更可靠地访问 Filemail 等文件共享服务。 不过,值得一提的是,中国政府会主动屏蔽 VPN 服务,而且它们的可访问性也可能不一致。 政府会定期收紧对 VPN 使用的控制,导致中断和限制。因此,虽然 VPN 可以提供一种变通办法,但它并不能保证在中国不间断地访问文件共享服务。 使用 Filemail 与中国共享文件 在中国的数字环境中,仍有一些文件共享服务运行得相对较好。Filemail 就是其中之一,它以安全、高效的文件传输功能而广受欢迎。 Filemail 是一种基于云的文件共享服务,允许用户轻松安全地发送大文件。它具有多种优势,适合中国用户选择。 首先,Filemail支持高速传输,确保即使在带宽有限的情况下也能快速高效地共享文件。这一点在中国尤为重要,因为中国的网速有时可能会比较慢。 使用 Filemail 安全共享文件 Filemail 的另一个主要特点是其安全措施。该服务采用加密技术保护传输过程中的文件,使未经授权的个人更难截获或访问共享数据。在网络隐私和数据保护备受关注的中国,这种安全级别至关重要。 此外,Filemail 还提供友好的用户界面,简化了文件共享过程。用户可以轻松地将文件上传到该平台,并生成安全的下载链接,然后通过电子邮件或其他信息平台发送给收件人。 这种直截了当的方法可确保发送方和接收方无需太多的专业技术知识或遇到困难即可使用该服务。 使用 Filemail 共享任何文件类型和格式 Filemail 的显著优势之一是兼容不同的文件格式。用户可以发送各种文件,包括文档、图像、视频,甚至大型档案。 这种多功能性对中国的专业人士和企业尤其有利,因为他们在日常运营中经常需要交换各种类型的文件。 此外,Filemail 还提供免费和付费订阅计划,用户可以选择最适合自己需求和预算的方案。免费计划通常对文件大小和存储容量有限制。 付费计划提供更多的功能,如更大的文件大小、更多的存储空间和高级定制选项。这种灵活性使不同需求和使用模式的用户都能使用 Filemail。 Filemail是一种可靠的文件共享服务,在中国运行有效。不过,必须注意的是,中国政府的互联网限制和审查制度可能会影响任何服务的可用性,包括Filemail。 在中国,政府采用各种方法(如 "防火长城")控制和监控互联网流量,限制访问某些网站和在线服务。 总结 总之,尽管互联网审查制度给中国的文件共享服务带来了挑战,但Filemail是一个可靠的选择。Filemail提供高速传输、强大的安全功能以及与各种文件格式的兼容性。这些特点使其成为中国用户寻求高效、安全的文件共享解决方案的绝佳选择。 但是,必须考虑到中国政府的互联网限制和审查制度所带来的限制。使用 VPN 可能是一种变通办法,但由于中国政府会定期对 VPN 的使用进行镇压,其效果可能并不稳定。 随着中国数字环境的不断发展,了解最新动态并做出相应调整以确保流畅安全的文件共享体验至关重要。 发送任何尺寸的大文件 无限的收件人、下载和带宽 查看我们的付费计划
什么是文件共享及其工作原理 八月 30, 2023八月 28, 2023 作者 ǞǞǞ 简介 在本文中,我将介绍什么是文件共享以及文件共享的工作原理。我将深入探讨文件共享的复杂性。 文件共享它揭示了其不同的方面、优势、挑战以及有效驾驭它们的方法。 我研究不同类型的文件共享解决方案,从传统方法到最新技术。这些解决方案使个人和组织都能在不同地点通过各种设备轻松共享、协作和访问信息。 免费共享高达 5 GB 的文件 不需要注册 立即分享文件 1.什么是文件共享? 文件共享已成为我们数字生活中不可或缺的一部分。人们出于个人和专业目的,在各种设备和网络上访问、交换和分发文件。但是,什么是文件共享?让我们先从定义开始。 文件共享的定义:文件共享是指从一个用户或设备向另一个用户或设备传输或分发数字文件的过程。 文件类型包括文档、图像、视频、音频文件等。文件共享的目的是实现不同设备、地点和人员之间的协作、信息交流和轻松访问文件。 文件共享具有众多优势,彻底改变了我们存储和访问信息的方式。首先,它允许多个用户查看和处理同一个文件,从而促进了协作,提高了生产力和效率。 此外,通过文件共享,可以从任何有互联网连接的设备上访问文件,从而消除了对物理存储设备的需求。 文件共享还有助于备份和恢复数据,在发生硬件故障或意外事件时确保重要文件的安全。它简化了文件分发,使与同事、客户或朋友共享大型文件变得更加容易,无论他们身处何地。 此外,文件共享实现了资源的无缝共享,减少了对重复文件的需求,促进了可持续发展。 2.文件共享如何运行? 文件共享的工作原理是允许用户通过各种方法将数字文件从一个设备或用户传输到另一个设备或用户。对于文件共享软件来说,这一过程通常包括以下步骤: 1.遴选: 用户从设备中选择要共享的文件。 2.启动: 用户通过选定的方式启动共享过程,如电子邮件、文件共享平台或直接连接。 3.上传: 如果文件共享方法涉及上传到云或服务器,则所选文件会被上传到一个集中位置。 4.生成链接: 可生成链接或访问代码,允许接收者访问共享文件。这可以包括密码保护或过期日期,以提高安全性。 5.通知: 接收者会通过电子邮件、通知或直接消息收到共享文件的通知。 6.下载: 接收者通过提供的链接或访问代码访问共享文件。然后,他们可以将文件下载到自己的设备上。 7.访问: 下载完成后,收件人即可访问文件,并可根据需要查看、编辑或共享文件。 8.完成: 一旦接收方获得文件并采取任何必要行动,文件共享流程即告完成。 文件共享有多种形式,例如以电子邮件附件的形式发送文件、使用云存储服务、通过点对点网络共享文件或利用协作平台。选择哪种方式取决于文件大小、安全要求、便利性和收件人的技术能力等因素。 3.共享文件的 7 种方法 既然我们已经知道了什么是文件共享,那就让我们来看看文件共享的各种方法。我们可以使用多种方法,每种方法都有其独特的优点和缺点。在本节中,我将概述这些方法的功能、适用性和潜在隐患。 点对点(P2P)文件共享 P2P 文件共享通过一个分散的网络运行,因此允许用户之间直接共享文件。由于无需中央服务器,P2P 可加快传输速度。 必须承认的是,某些 P2P 网络为以下行为提供了便利 侵犯版权 由于未经授权共享受版权保护的内容。 文件传输协议(FTP) FTP 是一种标准网络协议,用于在计算机网络的客户端和服务器之间传输文件。它提供安全可靠的文件共享,常用于企业和网络开发人员在网站上上传和下载文件。 云存储服务 云存储服务,如 Microsoft OneDrive、Google Drive 和 文件邮件近年来,云服务越来越受欢迎。这些服务允许用户将文件存储在云中,并与特定个人共享或供更多人访问。云存储可轻松实现跨设备同步,并具有强大的安全功能来保护文件。 电子邮件附件 电子邮件附件仍然是最简单的文件共享方法之一。用户可以将文件附加到电子邮件中,然后发送给收件人。不过,文件大小有限制,大附件可能会面临限制或导致传输缓慢。 合作平台 谷歌文档、微软 Office 365 和 Trello 等各种在线平台在提供文件共享功能的同时,还提供实时协作功能。这些平台可以让多个用户同时处理文件,是团队项目和远程协作的理想选择。 可移动媒体 与使用网络和互联网的在线文件共享不同,可移动媒体文件共享依赖于不同计算机或设备之间存储设备的物理传输。这种方法在以下情况下非常有用 互联网接入有限。传输不适合通过某些文件共享解决方案传输的大型笨重文件。需要严格保密。 不过,与某些在线替代方法相比,这种方法在速度、安全性和便利性方面可能也有局限性。 系统本地文件共享 系统本地文件共享涉及在本地网络内连接的设备之间共享文件和资源。这种类型的文件共享发生在封闭的环境中,如家庭或办公室网络,无需互联网连接。它使用户能够在电脑、笔记本电脑、智能手机和平板电脑等设备之间直接交换文件、文档、媒体和其他数据。 4.文件共享的 10 大优势 文件共享具有众多优势,这也是它广受欢迎和广泛使用的原因。本节强调文件共享如何协调这些优势,以提升工作流程和互联性。 合作 文件共享允许多个个人或团队处理同一文档、项目或任务。这可以促进协作,并通过不同用户的实时更新、反馈和贡献提高工作效率。 便捷的交通和配送 文件共享简化了访问和分发文件的过程。用户可以轻松地在线共享文件,允许远程用户访问,而无需物理传输或复杂的方法。 提高效率和节省时间 文件共享消除了手动传输文件的需要,减少了共享信息所需的时间和精力。它可以快速、方便地分发文件,从而提高各种工作流程和过程的效率。 经济高效 通过电子方式共享文件,可以省去打印、复印和运输实体文件的相关费用。由于文件是以数字方式存储和访问的,因此也减少了对大量存储基础设施的需求。 版本控制与修订跟踪 文件共享平台通常包含版本控制功能,允许用户跟踪一段时间内对文件所做的更改。这有助于避免混乱,并确保每个人都能访问文档或文件的最新版本。 增强安全性和备份 许多文件共享服务提供强大的安全措施,以保护文件免遭未经授权的访问。此外,基于云的文件共享平台通常具有内置备份机制。这可以确保系统保护文件,并在数据丢失或系统故障时进行恢复。 可扩展性和灵活性 文件共享可容纳各种文件类型和大小,因此适用于不同的用途和行业。无论是共享小型文档、大型多媒体文件,还是共享整个项目文件夹,文件共享都具有可扩展性和灵活性,可满足不同的需求。Filemail 没有任何限制,您可以共享任何类型和大小的文件。 全球无障碍环境 有了文件共享,地域界限不再是障碍。个人或团队可以与世界各地的人共享文件,促进跨时区的顺畅沟通与协作。 改进文件控制 文件共享平台通常提供细粒度的文件权限控制,允许用户定义谁可以访问、编辑或删除文件。这可以确保更好的文件控制和隐私保护,防止未经授权的修改或访问敏感信息。 环境效益 通过减少对纸质文件和运输的依赖,文件共享有助于环境的可持续发展。它最大限度地减少了与传统文件共享方法相关的纸张浪费、碳排放和能源消耗。 5.文件共享的 10 个弊端 文件共享在提高效率的同时,也带来了用户必须应对的挑战。认识到这些缺点,个人就能采取明智的预防措施,更有效地利用文件共享的好处。 安全与合规风险 如果不采取适当的预防措施,文件共享可能会带来安全风险。通过公共网络或不安全渠道共享的文件可能容易受到未经授权的访问、恶意软件或数据泄露的影响。必须使用安全的文件共享方法和平台,这些方法和平台应采用加密和其他安全措施。 安全措施. 侵犯版权 个人可以滥用文件共享非法传播受版权保护的资料,如电影、音乐或软件。这可能会给上传者和下载者带来法律后果,侵犯知识产权。 病毒和恶意软件 文件共享网络和平台可能是病毒、恶意软件和其他恶意文件的滋生地。用户可能会在不知情的情况下下载受感染的文件,这些文件可能会损害他们的设备或危及他们的数据安全。在从未知来源下载文件时,安装强大的杀毒软件并保持谨慎至关重要。 不可靠的资料来源和内容 文件共享会让用户接触到不同质量和可靠性的内容。共享文件可能不准确、过时或包含误导性信息。用户在出于关键目的依赖共享文件之前,应谨慎行事并核实来源的可信度。 限制存储大小、文件大小、共享限制 有些文件共享软件提供商会对共享功能施加某些限制。这可以是限制文件存储空间,也可以是限制可共享文件的最大大小。此外,有些文件共享解决方案还会施加进一步的限制,如限制下载次数或接收者人数。最后,有些解决方案还会设置带宽限制。 在 Filemail,我们没有这样的限制,因此您可以与任何人共享任何大小的文件: 无限制下载收件人数量不限无限带宽 对互联网连接的依赖 文件共享在很大程度上依赖于互联网连接。如果互联网连接速度慢、不稳定或不可用,就会破坏共享过程,阻碍协作。用户在离线时访问共享文件也会遇到困难。 失去对共享文件的控制 共享文件时,其他人会失去对如何使用或修改文件的控制。在协作环境中,必须制定明确的准则和权限,以保持控制并防止意外修改或删除。 兼容性问题 共享文件时,不同的文件格式和软件版本可能会导致兼容性问题。用户在打开或编辑从不相容平台或旧版软件共享的文件时可能会遇到困难。兼容性问题可能会扰乱工作流程,需要额外的努力才能解决。 隐私问题 共享文件时,存在隐私泄露的潜在风险,尤其是涉及敏感或机密信息时。考虑隐私影响并使用安全的文件共享方法至关重要,尤其是在共享个人、财务或专有数据时。 过度依赖第三方平台 第三方平台或云存储提供商提供了许多文件共享解决方案。这种对外部服务的依赖虽然方便,但如果平台出现宕机、数据丢失或政策变更影响访问或隐私,就会带来风险。 用户只要意识到这些缺点并采取必要的预防措施,就能降低风险,确保获得更安全、更高效的文件共享体验。 6.如何选择文件共享解决方案? 评估文件共享系统需要对各种因素进行评估,以确定哪种解决方案在安全性、功能性、易用性和可扩展性方面最符合您的需求。以下指南可帮助你评估不同的文件共享解决方案。 确定您的要求 明确概述贵组织对文件共享的要求和目标。考虑文件量、用户数量、安全需求、与现有系统的集成以及所需的任何特定功能等因素。 安全与合规 安全应该是重中之重。寻找在文件传输和静止时都能提供加密功能的解决方案。要考虑解决方案是否符合特定行业的合规标准(例如:安全标准)。HIPAA, GDPR等)(如适用)。 方便用户 用户友好的界面和直观的导航至关重要。解决方案应便于技术和非技术用户使用。 存储容量 评估解决方案提供的存储容量。确保它符合贵组织的需求和未来增长预测。 访问控制和权限 检查解决方案是否提供强大的访问控制功能。你应该能够为用户分配不同级别的权限,确保只有经过授权的人才能访问敏感数据。 协作功能 如果协作很重要,则应寻找实时编辑、版本控制、评论以及共同处理文档的功能。 与现有系统集成 考虑解决方案与当前软件和工具的集成程度。无缝集成可提高生产率并减少中断。 可扩展性 选择能随着企业发展而扩展的解决方案。它应能在不影响性能的情况下处理增加的用户和数据负载。 移动支持 检查解决方案是否提供本地移动应用程序,让用户可以从智能手机和平板电脑访问和共享文件。Filemail为以下应用提供本地文件传输应用程序 安卓 和 笔记本电脑免费下载和使用 发送大文件 最大可达 5 GB。 性能和速度 通过上传和下载不同大小的文件来测试解决方案的性能。评估文件传输的速度,确定是否存在明显的延迟。 在 Filemail,我们拥有分布在全球各地的服务器,以加快文件传输。我们的桌面应用程序适用于 窗户 和 Macs 使用 UDP传输加速 为您提供极快的速度,这是基于浏览器的解决方案无法提供的。 客户支持与培训 考虑解决方案提供商提供的客户支持水平。查找文档、教程和培训等资源,帮助您的团队尽快掌握。 成本与定价模式 了解定价结构,包括任何隐藏成本。将解决方案的定价与其功能和优势进行比较,以确定其对贵组织的价值。 备份和恢复 确定解决方案是否提供自动备份和意外数据丢失时的恢复程序。 用户反馈与评论 研究用户评论和反馈,深入了解使用过该解决方案的其他组织的经验。 试用期 在可能的情况下,利用试用期或免费版本来测试解决方案的功能,看看它是否能满足你的第一手需求。 未来路线图 研究解决方案提供商的计划和更新。这可以让您了解他们对改进和调整解决方案的承诺。 数据所有权与供应商锁定 明确数据所有权条款。确保在需要时可以轻松地将数据迁移到另一个解决方案,而不会被供应商锁定。 通过仔细评估这些因素并比较不同的文件共享解决方案,您可以做出符合贵组织要求和目标的明智决定。 7.如何安全可靠地共享文件的 15 个技巧 安全可靠地共享文件对于保护数据和敏感信息免遭未经授权的访问或潜在威胁至关重要。在本节中,我们将介绍保护文件的各种措施,例如实施访问控制,以便只有指定人员才能访问文件。以下是一些应遵循的准则。 使用安全平台 选择提供加密和安全功能、值得信赖、信誉良好的文件共享平台。Google Drive、Microsoft OneDrive 和 Filemail 等云存储服务为共享文件提供了安全的选择。 密码保护 为您的账户使用强密码,并尽可能为共享文件启用密码保护。这样可以增加一层安全保护,防止未经授权的访问。 加密 在共享文件前对文件进行加密。这样可以确保即使有人截获文件,在没有加密密钥的情况下也无法破译文件内容。 安全链接 如果您的文件共享平台提供该功能,请使用 安全链接共享 要求收件人登录或使用唯一链接访问文件的选项。 双因素验证 (2FA) 启用 2FA 您的账户。这就增加了一个额外的安全层,需要第二个验证步骤,如短信验证码或验证应用程序。 限制访问 只与需要访问的个人共享文件。除非必要,否则避免公开访问文件。 有效期 为共享链接设置失效日期。这样就能确保链接在一定期限后失效,减少未来未经授权访问的机会。 避免使用公共 Wi-Fi 共享敏感文件时,避免使用公共 Wi-Fi 网络,因为它们更容易受到黑客攻击和拦截。使用安全网络或 VPN 以加强保护。 扫描病毒和恶意软件 在共享任何文件之前,请确保这些文件没有恶意软件或病毒,否则可能会危及接收者的系统。 定期更新 及时更新操作系统、软件和安全工具,以防范已知漏洞。 安全文件传输协议 如果通过网络共享文件,请使用 SFTP(安全文件传输协议)或 HTTPS 等安全传输协议在传输过程中加密数据。 检查权限 共享文件时,请仔细检查您授予的权限和访问级别。确保不会在不经意间授予他人过多的访问权限。 教育受援者 如果您要与他人共享文件,请向他们宣传网络安全的重要性以及如何安全处理共享文件。 删除不需要的文件 定期清理和删除不再需要的文件。此举可降低恶意访问旧文件的风险。 备份 始终保留重要文件的备份副本。这样即使在共享过程中出现问题,也能确保数据安全。 遵循这些指导原则,可以大大提高文件共享活动的安全性,最大限度地降低与未经授权的访问或数据泄露相关的风险。 总结 在当今这个相互联系的世界里,文件共享在促进协作、提高可访问性和简化信息交流方面发挥着至关重要的作用。 了解了不同的文件共享方法,用户就能根据自己的需求选择最合适的方案。 通过有效使用文件共享技术,人们和团体可以简化工作、提高生产力,并在重视知识共享的数字世界中鼓励顺利开展团队合作。 分享任何大小的文件 无限的收件人、下载和带宽 查看我们的付费计划
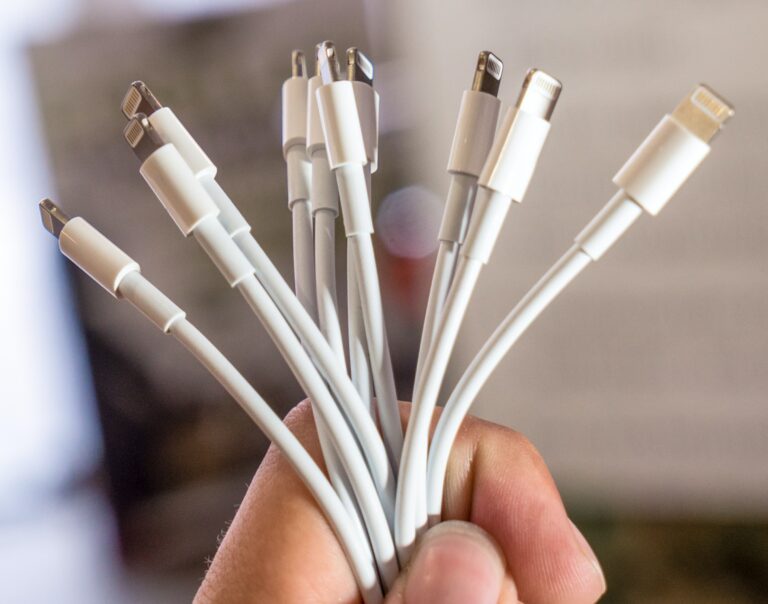
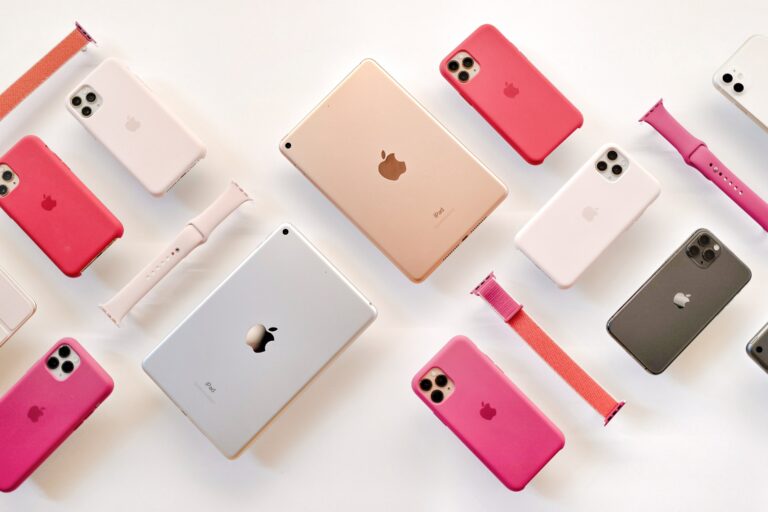
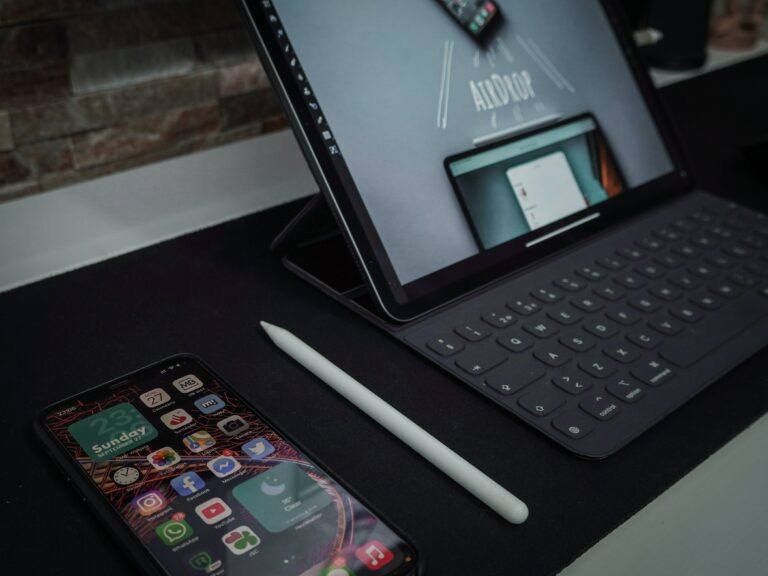
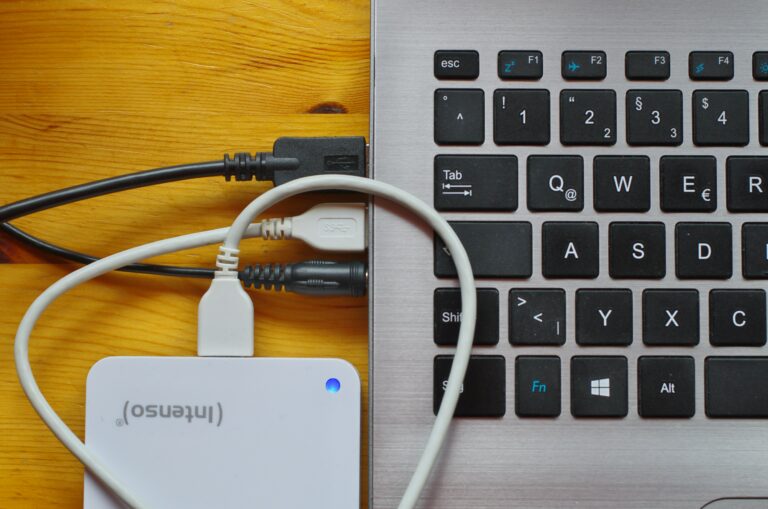
如何将文件从 iPhone 传输到电脑 四月 10, 2023四月 4, 2023 作者 ǞǞǞ 长期以来,如何将文件从 iPhone 转移到 PC 一直是个难题。iPhone 和 PC 之间有一定程度的兼容性;然而,与 Mac 的数据同步相比,它仍然很难 转移文件 在 iPhone 和电脑之间同步和传输数据。在 Windows 电脑和 iPhone 或 iPad 之间同步和传输数据有几种不同的方法。 如果你使用的是 iPhone,熟悉这些指南对你在需要进行 iOS 数据传输时将大有裨益。无论你是想将文件从 iPhone 转移到电脑,还是反之亦然,这些选项都能帮你实现。 免费传输高达5GB 不需要注册 现在传输文件 1.使用 iCloud 将文件从 iPhone 转移到电脑 总的来说 雲端服務 是在 iPhone 和几乎任何其他设备(包括 Windows PC)之间传输数据的最简单方法之一。从本质上讲,你可以将数据上传到 iCloud,然后在另一台设备上检索。 不过,免费的 iCloud 计划仅提供 5GB 的存储空间。因此,如果你想利用 iCloud 传输较大的文件,就必须订购高级计划。 启动 iPhone 上的文件 app。找到要传输到电脑的文件。长按 "复制 "按钮,轻触它即可复制单个文件。要复制多个文件,请使用菜单中的 "选择 "选项(带三个点)。在应用程序中,转到 iCloud Drive 并将复制的文件粘贴到那里。你的文件已传输到 iCloud Drive。使用 iCloud.com 或 Windows 版 iCloud Drive 应用程序将文件下载到电脑。 2.通过蓝牙将文件从 iPhone 传输到电脑 蓝牙是另一种将数据从 iPhone 传输到电脑的简单技术。不过,你需要记住的一点是,通过蓝牙从 iPhone 向电脑传输数据只适用于有限的几种不同文件格式。 由于手动选择文件进行 iPhone 到蓝牙文件传输非常耗时,因此只能通过蓝牙传输少量数据,也就是说只能共享有限的信息。 此外,蓝牙绝非最有效的数据传输方法。因此,下一段我们将讨论另一种有效的策略。 向上轻扫 iPhone 主屏幕上的设置面板,然后按住蓝牙标志不放。允许它连接到要传输数据的电脑。要开始传输,请选择 Windows 的 "设置 "选项,然后激活蓝牙选项。在窗口选项卡中,可以找到 "设备 "选项。从这里打开蓝牙,让蓝牙设备接受文件。选择要从 iPhone 传输到电脑的文件。这些文件会在电脑上弹出。 3.使用 Windows 上的文件资源管理器将文件从 iPhone 传输到电脑 现在,在这篇关于如何将文件从 iPhone 传输到电脑的文章中,我们将介绍最主流、最受欢迎的操作系统 Windows。你可能对文件资源管理器并不陌生,它是一款用于在 Windows 电脑上管理和传输文件的软件。它可以让你轻松访问电脑上的文件,并遍历电脑上的存储空间。 如果你需要传输的数据是 iPhone 相机胶卷中的照片和视频,Windows 文件资源管理器就是你的不二之选,因为它可以通过 USB 连接将照片和视频从 iPhone 直接传输到电脑。无需其他软件。 文件资源管理器有一个用于数据管理的图形用户界面。使用 USB 连接,可以将 iPhone 与电脑相连。解锁 iPhone 在 iPhone 上选择 "信任",允许连接成功建立。导航至 "此电脑" > "[您 iPhone 的名称]" > "内部存储" > "DCIM" > "100APPLE"。> 内部存储">"DCIM">"100APPLE"。你的 iPhone 图像将被整齐地整理到基于日期的文件夹中。现在您可以将所需照片复制到电脑上。 4.如何使用 iTunes 将文件从 iPhone 传输到电脑 其主要目的是 iTunes 文件共享是为了方便在电脑和 iPhone 或 iPad 上运行的兼容应用程序之间传输数据。如果你确定要传输的文件是由与文件共享兼容的应用程序生成的,那么你就可以使用此功能将资料从 iPhone 转移到电脑上。 要借助 iTunes 文件共享和 USB 将文件从 iPhone 传输到电脑,请按照以下步骤操作: 将 iPhone 连接到电脑,如果 iTunes 尚未自动运行,则启动 iTunes。在 iTunes 窗口中,转到 "设备 "选项卡,然后选择 "文件共享"。如果要将文件从一个程序传输到电脑上的另一个程序,请从列表中选择该程序。决定要将哪些文件复制到电脑后,选择这些文件,然后点击 "保存到 "按钮。要开始将文件从 iPhone 传输到电脑,请在电脑上选择一个存放文件的位置,然后点击 "保存到 "按钮。 5.使用 FileMail 将文件从 iPhone 传输到电脑 您可以借助以下工具将文件从 iOS 设备发送到电脑上 文件邮件.发送巨型电影、音频文件、高质量照片集和任何其他类型的媒体集都非常简单。 ǞǞǞ iPhone 文件传输应用程序 该软件易于使用,并有一个 "仅限 WiFi "选项,以防在使用该软件时超出移动数据限制。要开始使用,请在 iOS 设备上下载并安装该应用程序。您最多可以免费共享 5 GB 的数据,无需注册。 在 iPhone 上安装 Filemail ioS 移动应用程序在个人电脑上,导航至 Filemail 主页,或安装 Filemail Desktop PC 应用程序。这将使您获得 UDP 传输加速,从而提高传输速率。在 iPhone 上启动 FileMail 应用程序登录您当前的 FileMail 帐户,或者,如果您愿意,也可以跳过此步骤,无需支付一分钱即可使用我们的服务。点击 "附加文件 "按钮后,只需选择要发送的项目即可。请提供收件人的电子邮件地址、邮件主题和内容(可选)。点击 "发送"。如果您的移动数据有限,应用程序可能会询问是否只需使用 WiFi 连接即可发送文件。现在开始上传文件。上传完成后,我们会立即将下载链接发送到您的电子邮箱。点击链接,您将进入一个可以下载文件的页面。或者您也可以将链接带入我们专门的 基于 Windows 的电脑文件传输应用程序 并从那里下载。 6.如何将文件从 iPhone 传输到电脑--不同方法的优缺点 转移类型 优点 弊端 iTune 支持 USB 和 WiFi 连接。 不会降低图像和视频等文件的质量 并非所有 iDevice 应用程序都支持 iTunes 文件共享功能。 可以导入单个或多个文件,但不能导入文件夹 雲端服務 每当你修改文件时,所有设备都会同步更新。 它们与非 iOS 设备兼容,但与苹果生态系统的互动尤为有效。 通过额外的加密层加强文件的安全性。 需要互联网连接。 上传和下载数据可能会产生额外费用 如果服务器过于拥挤,文件传输有时会变得缓慢。 蓝牙共享 发送文件的过程非常简单 无需互联网连接即可访问 传输速度慢,发送文件需要很长时间 尤其难以发送大文件 最大传输距离为 100 米,对某些用户来说可能不够 文件资源管理器 使用方便,用户界面简单明了 在极短的时间内完成转账。 有时,iPhone 不会出现在 Windows 资源管理器中,因此无法在电脑上看到 iPhone 图像。 文件邮件 用户无需注册即可免费使用 无需注册 数据加密,使用快捷安全 支持快速高效地传输大文件 您需要有互联网连接。如果要共享超过 5GB 的文件,则需要订阅。 传输任何大小的文件 无限的收件人、下载和带宽 查看我们的付费计划
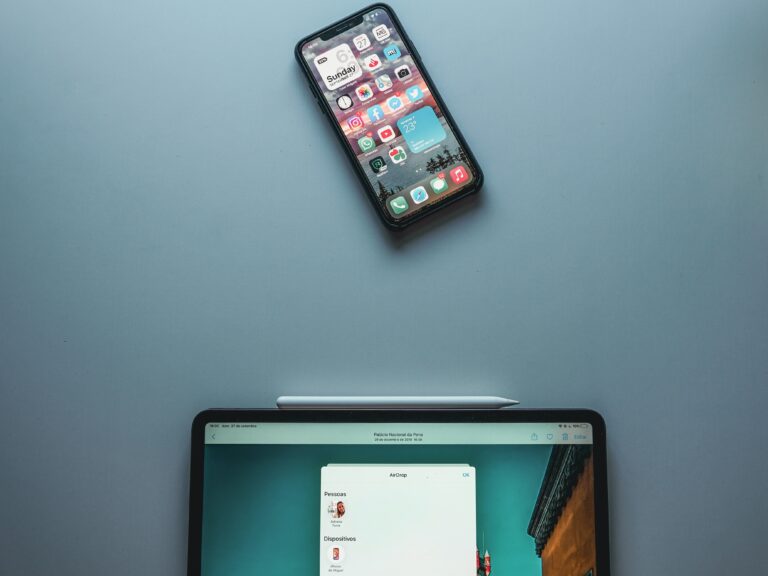
如何将文件从 iPhone 传输到 Mac 四月 10, 2023四月 4, 2023 作者 ǞǞǞ 本文将介绍 6 种将文件从 iPhone 转移到 Mac 的方法。我们还提供了分步说明,让您可以轻松地开始将这些文件从 iPhone 转移到 Mac。 如今,我们几乎无所不能地使用手机,因此手机是我们携带信息和文件的最重要设备之一。手机作为多功能设备,我们对它的依赖不可避免地会导致其内部存储中积累许多文件。一旦内部存储空间不足,你就会考虑如何 转移文件 从 iPhone 到 Mac,只要你深入苹果生态系统。 免费传输高达5GB 不需要注册 立即传输大型文件 1.使用数据线将文件从 iPhone 传输到 Mac 简单地将 iPhone 连接到 Mac 也许是将文件从 iPhone 传输到 Mac 或从 Mac 传输到 iPhone 的最直接方法。如果身边有可用的 USB 线缆,使用这种方法将相当简单。 第一步,将 USB 线的一端连接到 iPhone,另一端连接到 Mac。这将在两者之间建立链接,你会发现两台设备都能立即发现对方。单击 Mac 显示屏左上角的 Finder 图标。此操作将启动一个新的 Finder 窗口。向下滚动左侧边栏,就会在设备/位置下看到你的 iPhone。点击链接。选择要将文件移入和移出的位置。如果你想通过 USB 将文件从 Mac 传输到 iPhone,只需将文件从桌面拖到目标文件夹即可。如果你想将文件从手机移到电脑上,浏览到所需的文件夹,然后将文件拖放到桌面上即可。 2.使用 AirDrop 将文件从 iPhone 无线传输到 Mac 使用 AirDrop 应用程序,你可以发送各种文件,包括图片、视频、地点和网站。AirDrop 是 iPhone 和 Mac 之间传输数据最快、最有效的方法之一。 AirDrop 是 iOS 和 macOS 操作系统的核心组件,能让你快速、轻松地与附近的人传输文件。它利用蓝牙和 WiFi,即使你的设备没有连接到互联网,它也能正常工作。AirDrop 可以跨设备传输图片、视频、网页、位置等内容。 将 Mac 和 iPhone 连接到同一个无线网络,或通过蓝牙连接 Mac 和 iPhone。打开要从 iPhone 传输的文件,然后按共享图标。启动 "控制中心 "后,激活设备上的 WiFi 和蓝牙。然后,在 iPhone 上激活 AirDrop,并将手机设置更改为 "仅限所有人/联系人"。在 Mac 上,进入 "Finder "应用程序选择 AirDrop,然后点击 "Go "按钮并打开 AirDrop 功能。从下拉菜单中选择 "仅限联系人/所有人",激活 Macbook 上的 "允许被发现 "选项。在文件上找到 "共享 "按钮,然后选择 iPhone 上的 "AirDrop "选项。现在,请等待文件传输完成。 3.使用 iTunes 将文件从 iPhone 传输到 Mac 接下来,我们将介绍如何将文件从 iPhone 传输到 Mac。 iTunes.在将数据从 iPhone 传输到电脑时,大多数人仍然选择使用 iTunes。不过,在使用 iTunes 时,你只能将 iOS 设备上支持文件共享的应用程序中的数据传输到 Mac,这就限制了可传输的文件类型。 总的来说,通过 iTunes 账户同步音乐、电影、照片、通讯录、日历和设备备份有两种选择:USB无线网络 通过 USB 同步 iTunes 有了它,将文件从 iPhone 传输到 Mac 变得非常容易: 打开 iTunes。确保您拥有最新版本。用 USB 将 iPhone 连接到电脑。你会发现 iTunes 左上角的 "已连接设备 "中列出了一个设备。单击设备的符号。在 iTunes 的左侧,选择 "设置",查看可同步的资料种类。选择所需文件,然后单击 "在 iTunes 中同步"。选择 iTunes 右下角的 "应用"。从现在起,每次通过 USB 连接并打开 iTunes 时,设备都会自动同步。 使用 WiFi 同步 iTunes 如果事先已确认电脑运行的是最新版本的 iTunes,且 iPhone 和电脑连接到同一个 WiFi 网络,则可以将 iPhone 配置为通过 WiFi 同步资料。这需要一根闪电线来连接 iPhone 和电脑。 通过 USB 将 iPhone 连接到电脑。点击 iTunes 应用程序窗口左上角的 "设备 "按钮。摘要 "选项卡位于 "设置 "选项卡下。在 "通过 WiFi 与此设备同步 "旁边的方框中打勾,然后选择 "应用"。 4.使用 iCloud 将文件从 iPhone 传输到 Mac 简单明了,易于使用、 iCloud Drive 将文件整理到各自的文件夹中是该服务的众多优点之一。使用 Apple ID,你可以访问存储在台式机和 iPhone 上的数据。 请注意,使用此方法需要可靠的 WiFi 连接。此外,请检查你的 iPhone 和 Mac 是否正在运行各自操作系统的最新版本。您也可以按照以下说明进行操作。 点击桌面左上角的苹果弹出窗口,访问苹果菜单。从菜单中选择首选项系统。点击 iCloud 即可。使用与 Apple ID 关联的电子邮件地址和密码登录。要设置 iCloud,请按照屏幕上的说明操作。导航至 iPhone 上的 "设置 "应用。从出现的菜单中选择 "你的名字",然后选择 iCloud。打开 iCloud Drive,这是第四步。进入电脑上的苹果菜单,点击 "系统偏好设置"。 5.使用 FileMail 将文件从 iPhone 传输到 Mac 与 文件邮件 发送大型视频文件、音频文件、高质量照片集以及任何其他类型的媒体文件集都很简单。我们的 iPhone 文件传输应用程序 它易于使用,并有一个 "仅限 WiFi "选项,以防在使用时超出移动数据限制。 如果只共享 5GB 以下的文件,则无需注册,也无需订阅。FileMail 允许用户通过几个简单的步骤在 iPhone 和 Mac 之间以非常可行的方式共享和接收文件: 下载、安装并启动 FileMail 移动应用程序。点击 "添加文件"。导航到所需的文件和/或文件夹,并将其添加到附件中。您可以选择通过电子邮件发送文件,或上传文件并获得可共享链接。如果选择 "以电子邮件发送",请输入收件人的电子邮件地址。如果需要,可提交一条可选信息。按发送按钮。收件人将收到一封电子邮件,其中包含如何下载文件的说明。如果您选择 "以链接形式发送",在上传文件后,您将收到一个链接,您可以与任何您想共享文件的人共享该链接。在本例中,收件人是 Mac 用户,他可以使用我们的 桌面应用程序 来下载文件,这将提供 UDP 传输加速,从而提高速度和连接稳定性。 6.如何将文件从 iPhone 传输到 Mac - 探讨不同解决方案的优缺点 转移类型 优点 弊端 空投 由于它能自动检测附近的接收器,因此无需连接任何设备。 速度较慢,当代 Mac 机型之间的传输速率约为 40 MB/s。 如果在公共网络上使用,AirDrop 可能会被滥用,因此在允许他人通过该功能向你的 Mac 传输文件时要注意。 USB 电缆 使用简单明了 发送文件无需连接互联网 文件发送速度非常快,即使是大文件也不例外 它依赖于 USB 电缆的实际可用性,以及两个设备之间的距离。 iTunes 支持 USB 和 WiFi 连接。 不会造成图像和视频等文件的质量损失 并非所有 iDevice 应用程序都支持 iTunes 文件共享功能。 可以导入单个或多个文件,但不能导入文件夹 雲端服務 每当你利用云存储修改文件时,你的所有设备都会同步更新。 iCloud 服务与非 iOS 设备兼容,但与苹果生态系统的互动尤其有效。 云存储提供商通过附加层来加强其服务的安全性。 云文件存储需要互联网连接。 从云端上传和下载数据的相关费用可能会累积。 如果服务器过于拥挤,文件传输有时会变得缓慢。 文件邮件 无需注册。可免费共享最大 5 GB 的文件。 数据加密,使用快捷安全 支持快速高效地传输大文件 需要互联网连接。要共享超过 5B 的文件,您需要订阅。 传输任何大小的文件 无限的收件人、下载和带宽 查看我们的付费计划
如何将文件从 Mac 传输到 Mac 四月 10, 2023四月 4, 2023 作者 ǞǞǞ 在本文中,我们将介绍 7 种不同的方法,以解答如何将文件从 Mac 传输到 Mac 的问题。我们还将为您提供步骤说明,以便您可以立即开始使用建议的解决方案。 在某些情况下,通过苹果公司的统一操作系统,在苹果公司的众多设备之间传输文件和文件夹变得非常简单。因此,如果你想 共享文件 或者你刚刚购买了一台新 Mac,想把一些文件从以前的笔记本电脑转移到新电脑上,这将非常容易。 有几种方法可用于将文件从一台 Mac 转移到另一台 Mac 或在 Mac 之间交换数据。在本文中,我们将详细介绍适用于任何类型数据传输的最可行途径。 免费传输高达5GB 不需要注册 现在传输文件 1.使用迁移助手在 Mac 之间传输文件 Apple 的 "迁移助手 "可将你的所有文件从发送方 Mac 转移到目的地 Mac,从而省去了手动复制文件的麻烦。如果你的文件目前存储在 PC 上,则应遵循 PC 迁移程序。 在发送方Mac和接收方Mac上应用程序文件夹的实用工具区域启动Migration Assistant。在发送方 Mac 上,当被要求允许进行修改时,请输入管理员密码,然后单击 "确定"。当被问及如何传输数据时,请选择从 Mac、Time Machine 备份或启动盘传输。然后单击 "继续"。如果发送方 Mac 上出现安全代码,请确保该代码与新 Mac 上显示的代码一致。然后单击 "继续"。在新 Mac 上,选择要传输的信息。选择 "继续 "开始传输。大型传输可能需要数小时才能完成,因此,在晚上开始迁移并让其通宵运行可能最为方便。传输完成后,在两台电脑上同时解锁Migration Assistant,并连接到新Mac上的迁移账户查看文件。 2.使用 AirDrop 在 Mac 之间传输文件 如果你的两台 Mac 都运行 Mac OS X Lion 或更高版本、 空投 是在两台 Mac 之间快速共享文件的最简单方法之一,只要两台 Mac 都已更新,就可以使用该功能。无需使用 WiFi 在两台 Mac 之间传输文件,只要它们彼此靠近,就会自动在它们之间建立一个临时网络。 要使用 AirDrop,请在 Mac OS 的 Finder 中执行以下操作: 要启动 AirDrop,请按键盘上的 Command + Shift + R 键。要将文件传输到另一台 Mac,必须先等待该 Mac 变得可见,然后才能将文件拖放到该 Mac 上。使用接收文件的 Mac 接受文件传输。 3.使用 iMessage 将数据从 Mac 传输到 Mac iMessage 不仅仅是一种通讯方式,它还可以用来传输和共享文件。你甚至可以通过 iMessage 将文件从 Mac 远程传输到另一台 Mac。 你只需启动 Mac 上的 "信息 "应用程序。导航至 "应用程序 "下的 "信息 "菜单。开始新的 iMessage 对话。对话内容应发给你想发送的人。将文件或文件夹拖放到消息框中,或将文件或文件夹复制并粘贴到窗口中。要发送,只需点击回车键。当你通过 iMessage 发送文件或文件夹时,另一台 Mac 就会收到。之后,你可以在 iMessage 中右键单击附件并选择 "另存为",轻松保存附件。最后,将其存储在 Mac 的下载文件夹中。 4.通过蓝牙共享在 Mac 之间传输数据 现在,我们将在 "如何在 Mac 之间传输文件 "一文中介绍另一种替代方法--蓝牙共享。当两台 Mac 未连接到同一网络时,蓝牙共享是在它们之间传输数据的一种实用方法。 准备好发送方 MacBook,以便交换文件。单击菜单栏中的蓝牙图标,或单击系统偏好设置按钮,选择蓝牙,确保蓝牙已打开且系统处于 "可发现 "模式,从而打开目标 Mac 上的蓝牙。确认蓝牙共享选项已为服务启用后,进入主机上的 Finder,选择应用程序,双击实用工具,然后双击蓝牙文件交换。然后,在随后显示的蓝牙文件交换查找框中选择文件,单击 "共享 "按钮,然后导航到要发送的文件,即可将文件传输到另一台 Mac。点击 macOS 蓝牙连接窗口后,Exchange 将打开。这将允许你访问设备的公共文件夹,从设备下载文件,并将文件传输到设备。要接受连接,在作为目的地的 Mac 上,点击显示的 "连接请求 "框内的 "连接"。在 Mac 主机上,蓝牙连接窗口将获得更新,并显示目标系统已连接。在目的地 Mac 上,会出现一个窗口询问收件人是否接受发送的文件要将它们保存在 Mac 上,请单击 "接受 "按钮。 5.使用 iCloud 存储将文件从 Mac 传输到 Mac 毫无疑问、 iCloud 存储 可能会被视为连接苹果生态系统各个组成部分的不可追踪的纽带。无论何时,只要你误删了某个文件,或者电脑不在身边,你都可以恢复它。此外,你还可以随时随地访问 iCloud Drive 上存储的文件。 使用 Apple ID 可以非常方便地同步所有 Macbook 和其他设备上的数据。不过要注意的是,你需要为要传输的文件打开同步功能。 启动系统偏好设置,然后点击 Apple ID,再选择 iCloud。选择要同步的所有文件。在新 Mac 上使用相同的登录信息。 导航至系统偏好设置菜单,单击 Apple ID,然后单击登录。请输入与之关联的 Apple ID 和密码。其中一个已连接的设备可能会向您发送验证码。输入密码。随后,进入系统偏好设置 > Apple ID > iCloud 激活 iCloud 和其他文件存储服务。 6.使用文件共享在 Mac 之间传输文件 使用 macOS 内置的文件共享功能是最简单、最安全的文件传输解决方案之一。它位于 "共享 "选项中,允许你与同一网络上的授权用户或群组共享 Mac 上的文件和各种文件夹。 从 Apple 菜单中选择 "系统偏好设置",启动 "系统偏好设置 "窗口。选择共享首选项部分。共享首选项面板左侧包含一个可共享服务列表。在 "共享文件 "框中打勾。文件共享开启 "字样旁边会出现一个绿点。IP 地址会出现在文字的正下方。请记下 IP 地址,因为在下一步操作中会用到它。单击段落右侧标有 "选项 "的按钮。在 "用 SMB 共享文件和文件夹 "和 "用 AFP 共享文件和文件夹 "框中打勾。现在,你的 Mac 已准备好使用传统 Mac 的 AFP 和 Mac OS X 的 AFP 来分发文件和文件夹。从 Mac 的 Apple 菜单中选择 "系统偏好设置",然后单击 "共享 "偏好设置窗格。共享 "选项窗格的左侧列出了可以共享的功能。确保选中 "文件共享 "复选框。此时,你应该注意到在 "文件共享开启 "的文本旁边有一个绿色的复选标记。在文本下方可以看到 IP 地址。请记下 IP 地址,因为在以后的操作中需要用到该信息。点击文本右侧的 "选项 "按钮。在 "使用 SMB 共享文件和文件夹 "和 "使用 AFP 共享文件和文件夹 "的方框中打勾。现在,你的 Mac 已准备好通过 AFP 与其他电脑共享文件和文件夹,AFP 专为旧版 Mac 而设计。当你想传输文件时,你会在屏幕上方看到 Mac 的详细信息,在这些详细信息下方,你会看到一个名称。您可以将该名称提供给本地无线网络中任何其他希望共享访问您 Mac 的 Mac 机器。将你要公开的文件夹或文件放到你在系统偏好设置的设置菜单中配置的共享公共文件夹中。最后,其他 Mac 就可以访问它了! 7.使用 Filemail 在 Mac 之间传输文件 尽管 Mac 用户可以使用我们的网站相互共享文件,但在本节中,我将介绍 适用于 Mac 的 FileMail Desktop.通过我们的网站和桌面应用程序发送文件的过程是相同的,因此,即使您没有安装桌面应用程序,或者只想使用我们的网站,也可以继续使用。 此外,如果您想共享 5GB 以下的文件,使用 FileMail 无需任何费用。无需注册。 此外,如果您想共享 5GB 以下的文件,使用 FileMail 无需任何费用。无需注册。 启动桌面应用程序,或访问我们网站的主页。点击 "添加文件"。导航到所需的文件和/或文件夹,并将其添加到附件中。您可以选择通过电子邮件发送文件,或上传文件并获得可共享链接。如果选择 "以电子邮件发送",请输入收件人的电子邮件地址。如果需要,可提交一条可选信息。按发送按钮。收件人将收到一封电子邮件,其中包含如何下载文件的说明。如果您选择 "以链接形式发送",在上传文件后,您将收到一个链接,您可以与任何您想共享文件的人共享该链接。 如果你以专业身份工作,你几乎肯定会被要求向位于世界各地的个人和组织传输文件。 文件邮件 在这种情况下就会派上用场。没有困难的准备工作,没有需要阅读的二维码,也没有需要经过的障碍。发送文件就像发送电子邮件一样简单。 Filemail Desktop 应用程序可让您使用简单的拖放界面,将任何大小的巨型文件发送到任何电子邮件地址。您还可以将文件上传到私人 URL,与他人共享。Filemail UDP 协议增强了传输功能,使其成为通过互联网发送巨型文件的最快速、最可靠的方法。 探讨如何将文件从 Mac 传输到 Mac 的各种方法的优缺点 转移类型 优点 弊端 文件共享 这是一种直接的传输方式,传输速度非常快 由于你的 Mac 很可能已连接到本地网络,因此设置并启用 文件共享可能是大多数用户唯一需要做的修改。 两台设备必须共享一个网络才能运行。 空投 与许多其他选择相比,AirDrop 更快捷、更安全。 由于它能自动寻找附近的接收器,因此无需连接任何设备。 速度慢,现代 Mac 机型之间的传输速度大约为 40 MB/s。 如果在公共网络上使用,它可能会被恶意使用,因此在允许他人通过 AirDrop 向你的 Mac 传输文件时要提高警惕。 网络共享 对于希望频繁发送文件的用户来说,这是一种最有效的方法 两台设备必须共享一个网络才能运行。 迁移助理 直观选项,易于使用 它能复制你的所有文件,并允许你选择将哪些用户账户转移到新 Mac。 你的所有文件都将被复制。如果你的 Mac 多年来一直在升级,你可能会有数百甚至数千个过时文件占据空间。 雲端服務 使用云存储时,每当你对文件进行修改时,你的所有设备都会同步更新。 iCloud 服务同样适用于非 iOS 设备,但它们与苹果生态系统的整合尤为出色。 云存储提供商通过额外的层级来加强其服务的安全性。 云文件存储需要互联网连接。 从云端上传和下载数据可能会产生额外的费用。 有时,如果服务器超载,文件传输可能会变得迟缓。 文件邮件 免费使用,无需注册 支持大文件 快速、直接的传输时间 需要连接互联网。 如果要共享超大文件,则需要订购,但也提供 7 天免费试用。 传输任何大小的文件 无限的收件人、下载和带宽 查看我们的付费计划
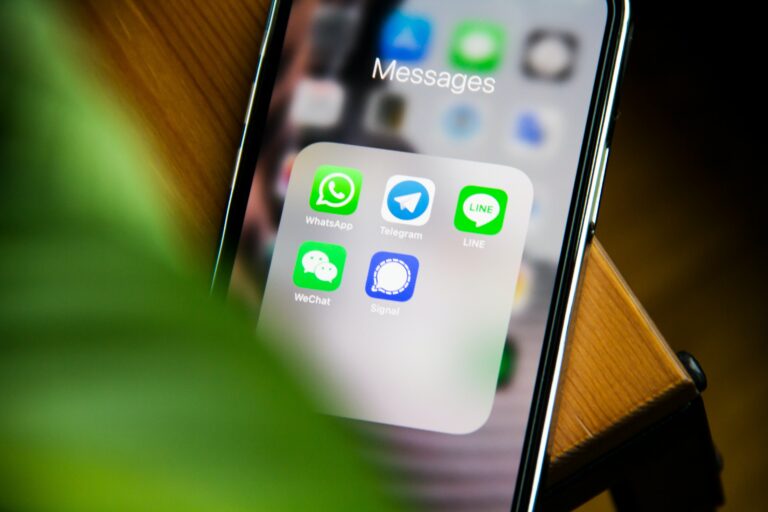
如何用Telegram发送大文件 三月, 2022三月 24, 2022 作者 ǞǞǞ Telegram是世界上最流行的信息传递应用程序之一。它简单,快速,安全,而且免费。由于Telegram强调隐私和安全,作为更成熟的聊天应用程序的替代品,它最近越来越受欢迎。就像其他消息应用程序一样,你可以使用该应用程序来分享文件,我们将讨论如何用Telegram发送大文件。 Telegram最好的一点是,它非常安全。信息是用一种几乎不可能被破解的秘密酱汁加密的。此外,Telegram是为数不多的提供端对端加密的信息传递应用程序之一。这意味着,你的信息从发送者到接收者都是完全安全的。 Telegram的另一个伟大之处在于它的速度。Telegram比SMS更快,而且也更便宜。Telegram使用一种叫做 "数据压缩 "的技术,这使得它的速度非常快。 Telegram使用起来也非常简单。用户界面很精简,易于理解。最后,Telegram是免费使用的。没有任何订阅费用或隐藏费用。如果你正在寻找一个快速、安全和简单的信息传递应用程序,Telegram是一个不错的选择。它适用于所有主要平台,包括iOS、Android、Windows和Mac。 免费传输高达5GB 不需要注册 现在传输文件 Telegram的安全功能 Telegram具有许多安全功能,使其成为信息传递的最佳选择。这些功能包括。 端到端加密。 Telegram的信息从头到尾都是加密的。这意味着,只有发件人和收件人可以阅读这些信息。甚至Telegram也不能阅读这些信息。 秘密聊天。 Telegram提供了一个名为 "秘密聊天 "的功能,这是一种加密的聊天,在一定时间后会自毁。 基于云的。 Telegram的信息存储在云端。这意味着,你可以从任何设备上访问你的信息。 开源。 Telegram是开源的。这意味着任何人都可以审计代码,以确保没有安全漏洞。 两步验证。 Telegram提供两步验证,以获得额外的安全层。 数据压缩。 Telegram使用数据压缩来使信息更快。 正如你所看到的,Telegram提供了许多功能,使其成为信息传递的最佳选择。它快速、安全,而且使用简单。如果你正在寻找传统短信的替代品,Telegram是一个不错的选择。 如何在Telegram中分享文件 Telegram提供了许多与联系人分享文件的方法。你可以通过以下方式分享文件。 电报组。 你可以在Telegram小组中与多达200人分享文件。 秘密聊天。 你可以在秘密聊天中与一个人分享文件。这些文件会在一定时间后自毁,这使得它们非常适合分享敏感文件。 云。 你可以与你的联系人列表中的任何人分享文件。这些文件将被存储在云端,可以从任何设备上访问。这可能是与很多人分享大文件的一个好方法。 直接发送消息。 你还可以通过直接发送消息与联系人列表中的人分享文件,这相对简单。 文件共享是Telegram最好的事情之一。它的操作很简单,而且提供了很大的灵活性。你可以与一群人分享文件,也可以在秘密聊天中与一个人分享。你还可以将文件存储在云端,这样就可以从任何设备上访问它们。 如果你正在寻找一个提供文件共享的消息应用程序,Telegram是一个不错的选择。它使用起来很简单,而且非常灵活。 电报文件大小限制 Telegram对每个文件的限制是2GB。这是一个相当高的限制,可以满足发送压缩图片、文件和类似性质的东西。然而,如果你需要发送一个大于2GB的文件,有一个变通办法。 那么,如何才能分享比Telegram所能处理的更大的文件呢?让我们来看看一些最流行的方法。 1.将文件分割成多个部分 如果你有一个大于2GB的文件,你可以把它分成多个部分并通过Telegram发送。这样做比较简单,对于较大的文件来说,这是一种流行的变通方法。 那么,你如何将你的文件分成多个部分呢?有几种不同的方法可以做到这一点。你可以使用HJSplit或7-Zip这样的文件分割器。或者,你可以使用像WinRAR或WinZip这样的文件压缩工具,将你的文件压缩成更小的部分。 一旦你将文件分割成多个部分,你就可以通过Telegram发送它们。这种方法可能要花点功夫,但这是通过该应用发送大文件的好方法。 2.压缩文件 对于Telegram的文件大小限制,另一个流行的解决方法是压缩你的文件。这可以用WinRAR或WinZip等文件压缩工具完成。 你可以很容易地压缩你的文件,使其更小。只要在WinRAR或WinZip中打开文件,选择 "添加到存档"。然后,选择一个压缩级别并点击 "确定"。 你的文件现在将被压缩并准备好通过Telegram发送。只要确保所有文件的总大小不超过2GB,你就可以了。 3.使用基于云的文件共享解决方案,如Filemail 如果你需要分享一个大于2GB的文件,你总是可以使用基于云的文件共享服务,这是一个流行的变通方法。 只需将你的文件上传到该服务,然后与你的联系人分享链接。他们将能够直接从该服务中下载该文件。 有很多不同的基于云的文件共享服务,所以你应该能够找到一个满足你的需求。Filemail是最受欢迎的服务之一,它允许你分享大型文件,而且非常容易使用。 Filemail是一个免费的服务,让你可以不费吹灰之力地发送大文件。它使用起来很简单,而且提供很多功能。Filemail提供4种不同的计划,因此你可以选择适合你需要的计划。免费计划允许你发送高达5GB的文件,这对大多数人来说是绰绰有余的。 你可以通过使用电子邮件或安全链接轻松地分享大文件,而且心安理得。Filemail具有许多功能,其中包括。 1.安全的文件传输 数据安全是许多人关心的一个大问题。当你分享敏感文件时,你要确保它们受到保护。Filemail使用SSL/TLS加密来保护你的数据在传输中。这意味着你的数据将是安全的,不会被窃听。 2.追踪你的共享文件 通过Filemail,你可以轻松地跟踪你的共享文件。如果你需要跟踪一个文件的状态,或者你需要验证文件是否被收到,这是一个很好的功能。 3.快速传输 Filemail使用一个定制的UDP传输加速协议。 这有助于确保你的文件被快速传输,即使它们很大。 4.符合隐私要求 Filemail允许你选择将你的文件存储在哪个地区。有了这个功能,你可以轻松地遵守国家法规和你的公司政策。 5.网站整合 Filemail可以很容易地集成到你的网站,只需一行HTML代码。这个功能允许你在你的网站上直接接收客户的大文件。 6.定制化和品牌化 如果你愿意,你可以定制Filemail以配合你的品牌。这是确保你的文件共享解决方案符合你公司形象的一个好方法。 总的来说,对于那些需要分享大文件的人来说,Filemail是一个不错的选择。它使用起来很简单,而且提供了很多功能。安全和合规功能也是一流的,这是许多人都会欣赏的。今天就试试Filemail,看看它如何能帮助你快速和轻松地分享文件。 总结 Telegram是一个伟大的消息传递应用程序,提供了很多灵活性。你可以与一群人分享文件,也可以在私人聊天中与一个人分享。Telegram还提供了许多不同的方式来分享文件,包括通过云端分享文件,压缩文件,以及将文件分割成多个部分。 如果你需要分享一个小于2GB的文件,你可以使用上述方法之一。但是,如果你需要发送大文件,基于云的文件共享服务是最好的方法。Filemail提供了许多功能,使其在人群中脱颖而出,所以请确保你试一试。 传输任何大小的文件 提供专业、商业和企业计划 查看我们的付费计划
备份计算机文件的方法 三月, 2022三月 22, 2022 作者 ǞǞǞ 大多数个人和组织都明白,在保护数字资产免遭删除、损坏、病毒和其他危险时,备份和恢复的关键性质。这就是为什么备份被认为是最后一道防线。总的来说,有多种方法来备份计算机文件,我们将进一步探讨。 免费发送高达5GB的信息 不需要注册 立即发送大文件 介绍。什么是文件备份? 从本质上讲,文件备份可以防止因意外或人为错误造成的重大数据损失。备份以备份文件格式写入文件系统备份,而恢复则读取文件系统备份,由不同的命令处理。 创建文件备份涉及在硬盘或外部备份或闪存驱动器上存储你的关键系统和个人信息的副本,以及其他存储选项。作为日常计算机维护的一部分,创建数据备份至关重要,以便在系统故障或文件损坏的情况下保护你的信息。 可用于备份或保存数据和数字文件的选择是相当多样化的。我们研究了个人用于备份和存档的最流行的数据存储设备,牢记每个人的要求是不同的,没有一个放之四海而皆准的选择。 人们想要备份的东西的类型 一般来说,你已经生成的文件是你应该保持备份的那种文件。正如你所知,数据丢失是经常发生的事。你的硬盘有可能在某个时候被损坏。文件也可能由于病毒感染、勒索软件攻击、Windows更新、断电和其他一些因素而丢失。因此,文件备份是防止数据丢失的关键。 各种项目 如果你从事任何创造性的工作,如编程、视频编辑或摄影,请务必备份你的数据,特别是当你正在进行的项目。 下载 默认情况下,下载的文件会存储在计算机的下载文件夹中。大多数在线浏览器和许多下载媒体的程序都选择这个文件夹作为下载的默认位置。 虽然你可能希望首先清除你不再需要的大型下载,但作为预防措施,为这个文件夹创建一个备份是好的。当你有一个几个月前下载的软件安装或PDF,你永远不知道什么时候你可能需要它。 应用 保持所有应用程序的备份可能也是一个好主意。这使得灾难恢复过程中的重新安装更加简单。正因为如此,建议你把你从互联网上下载和安装的任何新的应用程序放到一个专门的文件夹中,作为你定期备份程序的一部分,自动进行备份。 在你的互联网浏览器上的最爱或书签 您的书签(也称为收藏夹)的保存位置可能因您当前使用的互联网浏览器而不同。例如,如果您使用的是Windows,Internet Explorer可能会将您的书签保存在您的用户帐户文件夹中的 "收藏夹 "文件夹中。其他浏览器,如谷歌浏览器、火狐浏览器的同步功能,允许你在不同的设备上同步你的浏览器设置(包括书签)。 手动备份 使用手动备份,你必须在每次希望备份数据时开始备份过程。这是为那些希望掌握自己命运的人准备的。也就是说,只要你认为有必要,你就手动备份你的网站。 你将需要决定你想备份哪些文件,你想把它们备份到哪里,以及你想让它们多久保存一次。这需要时间,而你可能没有时间。 基于你选择的服务,备份网站的精确指示和方法可能有所不同。另一种手动备份的方法是下载并手动创建所有文件和数据的备份。 自动备份 自动备份代表了一种数据备份范式,其中数据从本地网络/系统备份和存储到备份设施,很少或没有人参与。自动备份过程消除了与手动备份计算机、网络或信息技术环境有关的时间和复杂性。 由于时间是当今最宝贵的资源之一,自动备份节省时间的事实是值得注意的,应该提请你注意。只需要提前计划一次你的日历,系统就会为你处理其他的事情 此外,当涉及在线交易时,安全问题与速度同样重要。你选择的做自动备份的供应商有责任维护你备份数据的安全:这包括保护你的网站不受潜在的黑客攻击、软件故障和其他安全缺陷的利用。 方法1:外部物理存储设备 没有比这更简单的了:只要把一个外部存储设备连接到你的电脑上,然后开始。自然,驱动器有各种各样的形式、尺寸和组合。一个基本的驱动器不会花费太多,但它除了坐等你做工作之外,什么也做不了。目前几乎所有的硬盘都使用高速USB-A 3.0或USB-C接口。 外置硬盘、SD卡和闪存盘都是物理存储的例子。这种存储设备使用户能够在没有互联网连接的情况下查看他们的文件,并通过将他们的文件实际交付给主管或家庭成员来转移他们的数据,确保没有其他人能够干涉这些数据。 尽管如此,对外部设备的担忧是,它们可能遭受某种形式的物理损坏,或被放错地方。 方法2:磁盘镜像克隆 克隆你的硬盘或你的硬盘的特定分区是备份你的计算机的一个常见方法。这将产生一个完全相同的、未压缩的克隆硬盘或硬盘的分区。 镜像是您所有数据的副本--每个文件和文件夹,以及应用程序和系统文件--是通过在某个时间点对您的硬盘进行快照创建的。当克隆或图像被用于恢复时,它覆盖了目前的框架,硬盘驱动器恢复到备份或克隆时的状态。 磁盘克隆是未压缩的,这意味着它们可以被即时复制到目标备份驱动器或云端,确保你总是有一个最新的、相同的数据副本。 对于备份,克隆对快速恢复有帮助,然而,成像为你提供了更多的备份可能性。采取增量备份快照可以让你保留几张照片而不用担心占用大量的额外空间。 当你成为勒索软件或其他数据灾难的受害者,需要将你的系统恢复到以前的磁盘镜像时,记住这一点非常关键。 方法3:使用基于云的在线解决方案 如今,我们可以自信地说,我们生活在云的时代。在线备份,以前被认为是一种专业服务,现在被认为是关键信息的标准做法。它已经成为备份计算机文件的最可行的方法之一! 云备份,有时也被称为在线备份或远程备份,是一种将物理或虚拟文件或数据库的副本转移到一个次要的异地目的地的技术,以便在设备故障或自然灾害的情况下保存。 通常情况下,二级服务器和数据存储结构由第三方服务提供商托管,根据使用的存储空间或容量、传输的数据量、客户数量、服务器数量或提供数据的次数,向备份客户收费。 你可以选择将文件自动备份到云端的同步软件,或者你可以手动操作。 同步软件,对于每个使用多台电脑或设备的人来说都是必不可少的,它可以保证你在所有的电脑上保存相同的文件。此外,它们一般也可以从移动设备上获得。 当你修改一个文件时,该变化会自动传达给连接到该账户的所有其他电脑,甚至那些运行不同操作系统的电脑。这是最完美的冗余的巅峰之作。 最终,云存储允许用户从全球任何地方共享和访问数据,而无需实际访问其内部存储系统。总的来说,云存储将信息存储在远程服务器上,可以对其进行远程维护和控制,并进行备份和检索。 传输任何大小的文件 快速安全的文件传输 查看我们的付费计划
为什么电子邮件不安全 三月, 2022三月 10, 2022 作者 ǞǞǞ 我们都听说过关于电子邮件安全的恐怖故事--从被黑的电子邮件到网络钓鱼计划--很容易理解为什么许多人认为电子邮件不是一个安全的通信媒介。然而,当你深入挖掘时,你会发现更多的问题,加强了电子邮件不安全的原因。 尽管存在安全问题,拥有超过40亿用户的电子邮件仍然是当今最流行的通信方式之一。根据 由Radicati集团进行的年度报告,2021年,每天发送和接收的商业和消费者电子邮件总数超过3190亿,预计到2025年底将增长到3.76亿以上。 但是,电子邮件真的像某些信息显示的那样不安全吗?答案是既是又不是。电子邮件当然不像其他一些通信方式那样安全,例如私人信息应用程序或安全电子邮件服务。 然而,只要有一点谨慎和常识,电子邮件仍然可以是一种相对安全的沟通方式。只是不要用它来发送机密文件。 免费传输高达5GB 不需要注册 立即发送大文件 电子邮件安全的问题 有很多原因导致电子邮件不像其他一些通信方式那样安全。首先,电子邮件没有加密,这意味着通过电子邮件发送的任何信息都无法避免被第三方攻击者截获。 电子邮件是一种 "广播 "通信媒介,这意味着任何发送到大量收件人的电子邮件都有可能被预定收件人以外的人阅读。有人也很容易创建一个假的电子邮件账户,冒充另一个人,这可以用来诈骗或钓鱼。 电子邮件安全的另一个问题是,攻击者往往很容易发送虚假的电子邮件(被称为 "网络钓鱼 "攻击),看起来像是来自一个值得信赖的来源,如朋友或同事。这些电子邮件往往包含指向恶意网站的链接或附件,可能使你的计算机感染恶意软件。 此外,许多电子邮件服务器并不安全,这意味着你的电子邮件信息很容易被第三方攻击者截获和阅读。对于公共电子邮件服务器,如Gmail、雅虎邮件和Hotmail,这一点尤其真实。还值得注意的是,电子邮件供应商可以(而且确实)访问你的电子邮件,以提供有针对性的广告。 总而言之,电子邮件的危险包括。 电子邮件没有加密,因此通过电子邮件发送的任何信息都无法避免被第三方攻击者截获。电子邮件是一种 "广播 "通信媒介,这意味着任何发送到大量收件人的电子邮件都有可能被目标收件人以外的人阅读。有人很容易创建一个假的电子邮件账户,冒充另一个人,这可以用来诈骗或钓鱼。电子邮件信息很容易被第三方攻击者截获和阅读。你的电子邮件信息可能被你的电子邮件供应商访问,以便提供有针对性的广告。 不应使用电子邮件发送的事物类型 有一些事情你不应该用电子邮件发送,因为它们被认为是高风险的。要知道这些东西是什么可能有点困难,因为什么是高风险和什么不是高风险之间的界限会根据情况而变化。 电子邮件不是发送敏感信息的安全方式,如密码、信用卡号码或银行账户细节。如果你需要发送机密信息,你应该使用一个安全的消息应用程序或加密的电子邮件服务。 你应该避免通过电子邮件发送高分辨率的图像或大文件,因为这些很容易被第三方攻击者截获和窃取。避免通过电子邮件附件发送敏感信息也是一个好主意,因为这些附件很容易被预定收件人以外的人打开。 通过电子邮件分享你的个人或财务信息不是一个好主意,因为这些信息很容易被骗子和身份窃贼窃取。你还应该警惕点击未知电子邮件地址的链接或下载附件,因为这些附件往往可能含有恶意软件或病毒。 你也应该避免使用电子邮件与你不认识的人沟通。电子邮件并不是与陌生人沟通的安全方式,因为骗子和钓鱼者很容易发送看似来自可信来源的假电子邮件。 教育自己了解电子邮件的危险,并采取一些简单的预防措施,可以帮助减少你的电子邮件被拦截或泄露的风险。因此,当你下次准备点击 "发送 "时,停下来问问自己:这封邮件真的安全吗? 发送机密文件的安全替代方案 通过电子邮件发送机密文件不是一个安全的过程,因为你的信息很容易被第三方攻击者截获和阅读。你不应该通过电子邮件发送机密文件,因为它们很容易被骗子和身份窃贼窃取。 如果你需要发送机密文件,你可以使用一些安全的电子邮件替代品。让我们来看看其中的几个。 1.私密信息应用 私人信息应用程序,如WhatsApp、Facebook Messenger和Signal,是一种与朋友和同事安全沟通的好方法。这些应用程序使用端到端加密,这意味着你的信息是加密的,只能由预定的收件人阅读。 优点 弊端 信息是加密的,第三方攻击者无法读取 不是所有的应用程序都提供端对端加密 许多应用程序提供高水平的安全和隐私 一些应用程序并不像其他应用程序那样安全 文件大小限制意味着你不能发送大文件 2.安全的电子邮件服务 安全电子邮件服务,如ProtonMail和Tutanota,提供高水平的安全和隐私。这些服务使用端对端加密,这意味着你的信息是加密的,只能由预定的收件人阅读。 优点 弊端 信息是加密的,第三方攻击者无法读取 不是所有的应用程序都提供端对端加密 许多应用程序提供高水平的安全和隐私 一些应用程序并不像其他应用程序那样安全 文件附件大小限制意味着你不能发送大文件 3.文件加密程序 文件加密程序,如VeraCrypt和BitLocker,是一种安全存储敏感文件的好方法。这些程序使用强大的加密算法,这意味着你的文件受到保护,不受第三方攻击。 优点 弊端 文件是加密的,第三方攻击者无法读取 程序可能不会在所有平台上提供 如果有技术能力,程序很容易使用 文件加密程序对某些人来说可能很复杂,难以使用 4.记忆棒 U盘是一种安全存储敏感文件的好方法。U盘可以被加密,这意味着你的文件可以免受第三方攻击。 优点 弊端 U盘是便携式的,无论你走到哪里都可以带着。 U盘可能会丢失或被盗 U盘很容易使用 不是所有的U盘都是加密的 U盘通常具有相对较小的存储容量 5.云存储服务 云存储服务,如iCloud、Google Drive和DropBox,是一种安全存储文件的好方法。这些服务使用强大的加密算法,这意味着你的文件受到保护,不受第三方攻击。 优点 弊端 文件是加密的,第三方攻击者无法读取 不是所有的服务都提供端到端的加密 许多服务提供高水平的安全和隐私 一些服务不如其他服务安全 需要付费订阅才能发送非常大的文件 6.网络附加存储(NAS) 网络附加存储(NAS)是一种安全存储文件的好方法。NAS设备类似于U盘,但它们提供了许多优势,如与其他用户共享文件的能力和备份文件的能力。 优点 弊端 文件是加密的,第三方攻击者无法读取 NAS设备可能丢失或被盗 NAS设备是便携式的,无论你走到哪里都可以带着。 不是所有的NAS设备都是加密的 NAS设备易于使用 总结 电子邮件不是发送机密文件的安全方式。通过电子邮件发送机密文件并不容易,而且你的文件有可能被第三方攻击者读取。了解电子邮件的各种安全替代方法可以帮助你保持你的机密文件的安全。 如果你需要发送机密文件,你可以使用一些安全的电子邮件替代品。在选择适合你的替代品之前,做彻底的研究是很重要的。确保选择一个安全的、提供高水平隐私的服务。 发送任何尺寸的大文件 以安全的方式分享机密文件 查看我们的付费计划
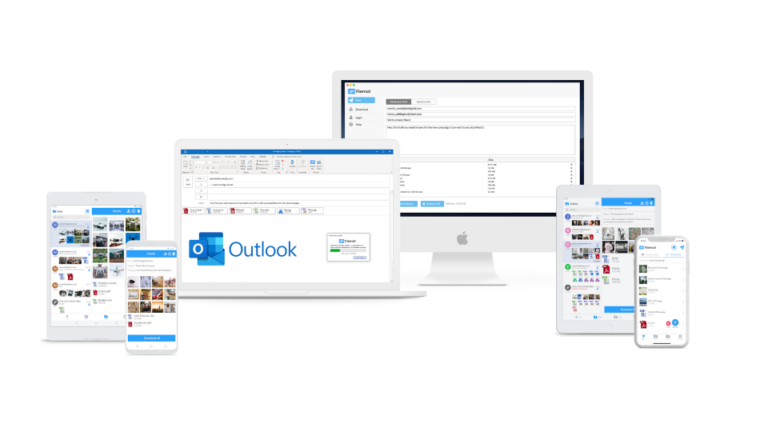
如何通过Outlook发送大文件 十月 19, 2022三月 4, 2022 作者 ǞǞǞ 你是否发现自己经常处理巨大的文件?那么你很有可能遇到了在电子邮件中传输文件的困难。试图弄清楚如何 发送大文件 通过Outlook和其他电子邮件客户端,将吞噬掉你几个小时的时间。 当你没有必要的工具时,大文件可能难以传输。无论你是向客户发送宣传片还是向团队成员发送大型数据集,都是如此。然而,这不应该是一个大障碍,因为有多种方法可以通过电子邮件发送巨大的电子邮件附件。 免费传输高达5GB 不需要注册 现在传输文件 什么是Outlook的文件大小限制? 你是否曾经试图发送一个文件给某人,但却被他们的电子邮件服务提供商告知文件太大?不幸的是,这是一个经常性的、令人恼火的问题。 文件附件的大小往往受到电子邮件供应商和软件的限制。如果你试图通过Outlook电子邮件发送巨大的文件,你可能会有困难。这是由于Outlook默认的文件大小限制是100MB。 使用Outlook发送大文件时的问题 你可能从一开始就对为什么无法传输巨大的文件感到困惑不解。通过电子邮件发送巨大的文件可能会导致服务器的速度减慢,并在电子邮件供应商的数据库中占用过多的空间。 对文件大小有这种限制,可以阻止你的计算机反复尝试上传超过大多数互联网服务提供商(ISP)的上传阈值的非常大的文件。 互联网电子邮件账户(如Outlook)的默认组合文件大小限制是20兆字节(MB),但Exchange账户(商业电子邮件)的默认组合文件大小限制是10兆字节(MB)。任何试图附加大于最大尺寸限制的文件的行为都会导致错误通知。 如何通过Outlook发送大文件的步骤 用Microsoft Outlook电子邮件发送附件是一个直接的方法来传输文件给他人,无论你是发送图像、报告或其他文件。每次你选择在电子邮件中附加一个文件,Outlook就会保持对你最近工作的文件的记录,并随时向你提出这些文件。 你可以将个人电脑、OneDrive或其他存储账户中的文件附加到电子邮件和日历事件中,并使用附加文件功能与其他人分享。在你的电子邮件和日历事件中添加图片也是一个选项。 展望未来,我们将探索两个可能允许用户发送大文件的选项。OneDrive和Filemail。 1.通过OneDrive发送大型文件 OneDrive代表了发送大文件的一个可行的选择,作为微软提供的一个流行的云存储选项,是一个良好的开始。作为提醒,如果你有一个免费的Outlook账户,你将自动获得15GB的OneDrive的存储空间。 更多的容量可以通过订阅一个计划来获得,最多可提供1TB的存储空间。需要传输巨大文件的Outlook用户可以利用OneDrive作为一个方便的选择。请注意,你必须首先将文件保存到OneDrive for Business,然后才能与他人分享。 只要其他队友登录了他们公司的Office 365账户,就有可能与他们分享文件。然后他们将能够通过你提供给他们的任何链接看到该文件。 还值得注意的是,由于你已经与你组织中的任何人共享了该项目,它将显示在每个人的OneDrive中的共享>与我共享文件夹下。因此,组织中的每个人都能从Office 365环境中出现的任何地方访问该文件,例如,如果有人搜索它。 1.进入OneDrive网站,用你的微软账户信息(或你的工作或学校账户)登录。 2.点击你想分享的项目右上角的圆圈,在一个新窗口中打开它。进入OneDrive界面后,你会看到上传新文件或文件夹到账户的选择。 3.选择上传文件的选项。分享按钮可以在网站上每个页面的顶部找到。 虽然在这种情况下你可以上传整个文件夹的文件,但在这种情况下你可能想使用文件标签。一个文件上传的周期将在OneDrive上开始。最终,根据你的网络连接质量和文件大小,上传过程可能需要几分钟到几个小时。 4.通过点击铅笔符号并选择 "编辑 "或 "查看",选择是否允许与你共享文件的个人对其进行修改。可以访问该文件或文件夹的个人将收到一封带有链接的电子邮件。在收到文件已被预定收件人看到的信息后,你将会收到一封确认电子邮件。 如果你想让其他人在文件发布后能够修改文件,请指定他们是否可以这样做。改变权限,通过点击 "改变权限 "按钮,确定你想对你刚刚分享的文件做什么。可以在两个选择中选择一个。 使用Filemail通过Outlook发送大文件 Filemail代表了向他人发送大文件的最快速和最方便的方法之一。Filemail是一个基于网络的平台,包括一些应用程序和服务,允许用户从世界任何地方发送和接收任何大小的巨大文件。用户友好的应用程序和闪电般的云计算架构,使得从任何设备上运输巨大的文件成为可能,而且时间创纪录。 当你使用 文件邮件Outlook插件,你可以通过利用Filemail直接从Outlook 2013/2016/2019传输巨大的文件。以你通常在Outlook中的相同方式附加文件,然后点击发送。附件将从电子邮件中删除,并上传到我们的服务器,从而使收件人收到的电子邮件更小、更容易投递。 Filemal的唯一限制与免费的、不需要账户的服务有关,就是你可以上传不限数量的文件,但它们在每个上传时段的总大小不得超过5GB,以便被视为免费。在24小时内,你被允许进行两次传输。所有的订阅计划都为你提供无限的上传会话,你可以上传任何大小的文件,无论它们有多大。 此外,没有任何需要担心的下载限制。你有可能与他人共享文件,而这些人可以从你的共享文件夹中任意下载这些文件。 你可以完全控制你如何上传文件到Filemail。使用网络浏览器、Filemail桌面应用程序之一、iOS应用程序,甚至是Android应用程序。 1.选择一个文件或文件夹 从你的电脑硬盘上选择你想上传的文件。或者,你也可以直接拖放你的文件。你可以选择提交你想与之分享文件的人的电子邮件地址。 2.上传你的文件 一旦你点击发送,我们就开始上传文件。你的文件是安全的,因为它们受到端到端加密和安全文件托管系统的保护。 3.人们下载你的文件 完成上传后,Filemail会将你的数据存储在云端。 你在步骤1中发送电子邮件的人可以下载这些文件。你也可以将你上传的文件的直接链接分发给其他人。 分享任何大小的文件 直接从Outlook开始共享文件 查看我们的付费计划
如何在互联网上分享大型文件 十月 19, 2022三月 4, 2022 作者 ǞǞǞ 我们都知道,要想弄清如何 共享大文件 通过互联网。无论是文件、照片还是视频,将其从一台计算机传输到另一台计算机的过程可能是令人沮丧的缓慢。但有了正确的工具,就不必如此了。 在谷歌上快速搜索 "如何在互联网上分享大文件 "会给你带来大量的选择。但并不是所有的服务都是平等的。一些服务更适合发送小文件,而另一些则是为大文件设计的。 在互联网上共享大文件的方法有很多,但并非所有的方法都是一样的。在这篇文章中,我们将探讨一些最流行的分享大文件的方法,并讨论每种方法的优点和缺点。让我们开始吧! 免费分享高达5GB的内容 不需要注册 现在分享大文件 压缩文件 在你发送任何文件之前,重要的是确保它们被尽可能地压缩。这将有助于减少发送它们所需的时间,也为你节省一些带宽。 压缩文件的方法有很多,但最流行的可能是ZIP压缩。这是大多数文件压缩工具使用的格式,包括WinZip和7-Zip。 使用WinZip或7zip等压缩软件来压缩文件是相当容易的。只要选择你想压缩的文件,右键单击它们,然后选择 "压缩 "选项。这将创建一个新的压缩文件,体积更小,发送时间更短。该文件将被保存为ZIP文件,然后你可以通过互联网发送。 用电子邮件发送大文件 在互联网上发送文件最常见的方式是通过电子邮件。这是一种快速和简单的方法,不需要任何特殊的软件或工具。电子邮件还具有普遍支持的优势,因此几乎每个人都可以使用它。 拟 通过电子邮件发送文件只要把它附在电子邮件中并发送给收件人。然后他们可以打开附件并将文件保存到他们的电脑上。就这么简单! 电子邮件的缺点是它可能很慢而且不可靠,特别是如果文件很大的话。电子邮件服务器也可能超载,这可能导致文件需要很长的时间来下载。此外,电子邮件对于小文件来说是一个很好的选择,但对于大文件来说,它并不理想。电子邮件附件的最大尺寸通常在25MB左右,这对于较大的文件来说可能是不够的。 使用笔电/U盘 如果你需要发送一个大于25MB的文件,你可以使用一个笔式驱动器或USB驱动器。这是一个物理设备,你可以用它来存储和在计算机之间传输文件。 USB驱动器有各种尺寸,从1GB到128GB。它们也相对便宜,这使它们成为传输大文件的好选择。然而,如果你不在有USB端口的电脑附近,它们可能会很不方便。 要使用USB驱动器发送文件,首先将文件复制到驱动器上。然后,将驱动器插入收件人的计算机并打开它。该文件将被保存到计算机的硬盘上。 使用USB驱动器的缺点是,可能很难找到有USB驱动器的人。此外,不是每个人都有一个U盘,这意味着不是每个人都能通过这种方式接收文件。因此,如果你正在寻找一种向更多人发送文件的方式,USB驱动器可能不是最佳选择。 分享大文件的外置硬盘 发送大文件的另一个选择是使用外部驱动器。这是一个可以插入收件人电脑的物理设备,可以用来存储和传输文件。 外置硬盘有各种尺寸,从几千兆字节到几万兆字节。它们也可能很贵,取决于你选择的大小和类型。确保外置硬盘与收件人的电脑兼容也很重要。 要使用外置硬盘发送文件,首先将文件复制到硬盘上。然后,从你的电脑上拔下硬盘,将其插入收件人的电脑。该文件将被保存到计算机的硬盘上。 使用外部驱动器的缺点是,可能很难找到有外部驱动器的人。此外,不是每个人都有一个外部驱动器,这意味着不是每个人都能通过这种方式接收文件。 使用FTP 如果你需要发送一个大于25MB的文件,而收件人没有USB驱动器或外部驱动器,你可以使用FTP。FTP是文件传输协议的缩写,它是一种在计算机之间传输文件的方式。 要使用FTP发送文件,你首先需要找到一个FTP服务器。这是一台专门为存储和共享文件而设置的计算机。最流行的FTP服务器是FileZilla,你可以免费下载。 一旦你安装了FTP服务器,你可以打开它并创建一个新的连接。在 "连接到服务器 "窗口中,输入FTP服务器的地址并点击 "连接"。用户名和密码字段将被自动填入。 接下来,导航到存储文件的文件夹。把文件从本地窗口拖到远程窗口,然后点击上传。该文件将被传输到FTP服务器并保存在指定的文件夹中。 使用FTP的缺点是,找到一个FTP服务器可能很困难。此外,不是每个人都知道如何使用FTP,这意味着不是每个人都能通过这种方式接收文件。 基于云的文件共享服务 基于云的文件共享服务 是发送大文件的另一个选择。这些服务允许你将文件上传到互联网并与其他人分享。 它们很容易使用,而且大多数都有一个免费级别,允许你发送一定大小的文件。最流行的基于云的文件共享服务是Google Drive、iCloud和DropBox。 那么,基于云的文件共享服务是如何工作的? 基本上,你在该服务中创建一个账户,然后上传你想分享的文件。这些文件被储存在服务的服务器上,然后你可以通过向其他人发送一个链接来分享它们。这个链接可以用来下载文件,也可以在线播放。 然而,在使用基于云的文件共享服务时,有几件事需要注意。 首先,并非所有这些服务都是免费的。其中一些需要付费订阅才能使用该服务。第二,你上传到这些服务的文件通常存储在一个公共文件夹中。这意味着,任何能够访问该链接的人都可以下载这些文件。最后,文件共享服务可能离线或遇到其他技术困难,这意味着文件可能无法访问。 要使用基于云的文件共享服务发送文件,首先将文件上传到该服务。然后,打开服务,与收件人分享文件。他们将能够下载该文件并将其保存到他们的计算机上。 基于云的文件共享服务的缺点是,它们可能很慢而且不可靠。此外,不是每个人都有订阅这些服务,这意味着不是每个人都能通过这种方式接收文件。 文件邮件 文件邮件 是为各种规模的个人和企业寻找一种安全的方式来传输巨大的文件的完美解决方案。Filemail因其易于使用、传输速度快、存储空间大和安全合规的数据处理而声名鹊起。 使用Filemail,发送文件是没有大小限制的。这意味着,你可以发送任何大小的文件,而不必担心超过限制。Filemail提供双因素认证和端到端加密,这确保了你的文件是安全和有保障的。此外,Filemail还带有病毒扫描功能,在发送前对所有文件进行病毒扫描。请确保为您的下一次大型文件传输查看Filemail! 总结 在互联网上发送大文件可能是一个挑战,但有几种选择可用。最流行的方法包括压缩文件,使用电子邮件,美元驱动器,外部驱动器,FTP,或基于云的文件共享服务。每种方法都有自己的优势和劣势,所以选择最适合你需要的方法很重要。 在选择一个方法之前,一定要做彻底的研究,因为这将有助于确保成功的文件传输。牢记文件大小也很重要,因为有些方法可能不适合较大的文件。 最后,请记住,发送大文件的最佳方式是使用各种方法的组合。这将有助于确保文件的成功发送,无论互联网连接速度或文件大小如何。发送愉快 分享任何大小的文件 快速安全的文件共享 查看我们的付费计划
1TB的数据存储是多少钱 三月, 2022三月 1, 2022 作者 ǞǞǞ 我们利用数字设备进行各种活动,包括上网、听音乐、观看电影和视频、通过社交媒体与朋友和家人聊天,以及给朋友和家人打电话。你会对你的个人电脑或智能手机所消耗的数据量感到惊讶!但是,这些设备,以及延伸到你,使用了多少数据?它们能储存多少? 你会读到诸如兆字节(MB)、千兆字节(GB)和太字节(TB)的东西,但它们在现实世界的适用性方面相当于什么?1TB的数据存储量是多少,你能用它真正存储什么? 免费分享高达5GB的内容 不需要注册 立即传输大文件 指定数据单位 计算机的内存被定义为能够存储数据的任何物理设备,无论其大小或持续时间。文件大小经常以千字节表示,因为大多数文件由成千上万的字节组成。 兆字节用于描述较大的文件,如照片、电影和音频文件,其中包括数百万字节。由于现代存储设备可以容纳数百个这样的文件,存储容量通常被定义为千兆字节甚至兆字节。 较大的测量单位通常被分配用于计算许多存储设备或大数据存储网络的容量。 可保存在个人电脑或移动设备上的最大文件大小是以KB(千字节)、MB(兆字节)、GB(千兆字节)或TB(太字节)为单位的。随着技术的发展,移动设备必须应对越来越大的文件,使数据存储容量成为未来的重要考虑因素。 1 字节 = 8位*,可能是八个1或0,包含在一个字节中。这个八位数代表了数据存储系统中最小的常规单位。 1 千字节 (KB) = 1,024字节,不需要Kilo前缀的文件是那些枯燥的文件,如word文档、excel电子表格和大多数图像。 1兆字节(MB) = 1024 KB。1MB通常用于听音乐和短视频。即使是老式的软盘也能存储大量的内容。 1千兆字节(GB) = 1,024 MB。GB正迅速成为存储容量的标准单位,因为大多数计算机硬件制造商都以GB为单位进行容量宣传。 1太字节(TB) = 1,024 GB。目前,衡量一个普通硬盘大小的最常见方法是用TB。 10GB是多少钱? 根据通信管理局的数据,典型的消费者每月消耗约2.9GB的数据,随着技术的发展,这一数字正在逐年增加。这表明,对于典型的智能手机用户来说,10GB很可能是足够的。然而,这主要取决于你如何使用你的手机。例如,如果你喜欢看流媒体电影和玩在线游戏,你会想考虑更高的数据分配。 100GB是多少钱? 如果你主要依赖移动数据而不是Wi-Fi,你可能想探索高容量的计划,如100GB。每个月,100GB是一个相当大的数据访问量。它通常被认为是最接近于无限数据计划的计划,而不需要走到最后一步。 1TB的数据存储是多少钱? 自1.44MB软盘时代以来,数据存储技术已经有了很大的进步。在笔记本电脑、台式电脑和游戏机等设备上经常可以看到一兆字节的存储量(1024GB)。如今,1TB的存储量相当于大约16部(64GB)iPhone或三星Galaxy智能手机。 1TB也大约相当于四台(256GB)Windows或MacBook笔记本电脑--系统软件会消耗一些存储空间。此外,单个外部硬盘的容量通常从1TB开始,最高可达32TB。 你如何使用1TB的互联网数据? 为了在一个月内使用1TB的数据,你需要串流大约171小时的4K视频。这相当于在一个月内每天播放6小时的4K视频,以每天6小时的速度。如果你关注数据使用,你应该努力更主动地控制它。 1TB为您提供了存储以下信息的选择。 每天发送或接收200封电子邮件(一个月内总共发送6,200封电子邮件)每天听5小时的音乐(一个月共155小时),并做其他事情每天5小时的网上冲浪(每月共155小时)每天10小时的高清视频流(每月共310小时)。用12MP相机拍摄的256张照片。250部电影或500小时的高清晰度视频。650万个文件页,这些文件通常以Office文件、PDF文件和演示文稿的形式保存--这一数量相当于1300个真正的文件柜! 介绍一下云存储 云存储使用户能够远程交换和访问数据,而不需要访问其内部的存储系统。总的来说,云存储将数据保留在遥远的服务器上,从那里可以对数据进行远程维护、管理、备份和访问。 基于云的数据可以在任何时间从任何设备上获得,只要有适当的权限。尽管它易于访问,但基于云的数据存储是令人难以置信的安全。 将数据转移到异地存储,将数据存储的责任放在第三方云服务提供商的肩上。服务提供商托管、保护、管理和保存服务器和相关的基础设施,确保你在需要的时候可以访问你的数据。 服务提供商不收取这项服务的费用。与云存储相关的大量好处被进一步仔细研究。 安全问题 云存储供应商通过包括额外的安全级别来增强其服务的安全性。面对大量在互联网上保存信息的人,云存储服务费尽心思,确保你的文件不被任何不应该接触的人接触。 一旦数据在互联网上被发送,它就会受到加密技术的保护。这保证了在任何时候都能保持最大的安全水平。 无障碍设施 当你利用云存储时,你的数据被保存在云供应商的服务器上,可以通过互联网访问。由于云供应商的应用程序可以安装在许多设备上,如你的公司电脑或智能手机,你可以在任何时间和任何地点访问你的数据。 登录并与其他团队成员协作从未如此简单。此外,该应用程序保证你的文件是同步的,确保团队成员总是可以从他们的首选设备上获得最新的版本。 服务能力 你以每个用户为基础支付云存储的费用。你不需要预测你的年度存储需求,也不需要承担为浪费的空间付费或耗尽的风险。你可以通过云存储供应商定制你可获得的资源,并根据你当前的需求支付费用,这些需求可能随时间变化。 加强合作 当团队共享数据和工具时,他们可以更有效地进行协作。正如研究表明的那样,合作会带来卓越的成果。这是因为伙伴关系将几个人的不同技能融合到一个共同的努力中。 它通过纳入具有不同背景、专业和思维模式的人和组织的许多观点,产生更好的想法。加强合作会产生更多的创新想法,因为它融合了具有不同经验、知识和思维模式的人和组织的众多观点。 加强合作 从熟悉的本地磁盘存储过渡到云存储可能是一个困难的过程,但它每天都在变得越来越普遍。使用云存储与本地磁盘存储相比,有几个优势。在未来,云存储代表了那些寻找安全、可访问的数据存储方法的最可行的机会之一。 发送任何大小的文件 专业、商业和企业计划 查看我们的付费计划
用于安全文件传输的5大FTP替代品 三月, 2022二月 17, 2022 作者 ǞǞǞ 文件传输协议是当今在互联网上传输文件最常用的协议之一。在许多场合,FTP已经证明自己是简单、高效和可靠的。然而,有些时候,FTP并不是最佳解决方案。当安全、速度或只是数据的完整性至关重要时,必须考虑FTP的替代方案。在这篇文章中,我们将介绍五个FTP替代品,它们为在互联网上交换文件提供了更安全的手段。 免费传输高达5GB 不需要注册 立即传输大文件 什么是FTP? FTP是一个允许用户在互联网上上传和下载文件的协议。它首次开发于1971年,使其成为用于互联网文件传输的最早的协议之一。 该协议一鸣惊人,支持每秒110万比特的文件传输。最初,只有文本文件可以用这种方式传输,但很快用户就可以上传和下载文本和二进制文件。 FTP使用客户-服务器模式来发送文件。FTP客户端发起与FTP服务器的连接,协商认证细节,向服务器发送命令,并从服务器接收响应。该协议还支持主动和被动模式,用于传输文件和文件管理任务,如目录列表和删除。 通过FTP,发送到服务器的每条命令都有一个数字的响应代码。这些代码是为了表明命令的状态,因此用户可以快速确定命令所要求的行动是否成功。 为什么你需要一个FTP替代品 今天,有许多方法可以在互联网上传输文件,但FTP仍然是使用最普遍的协议之一。它简单、高效,使用起来也很直截了当。在许多方面,它是一个可靠的文件传输协议。 然而,FTP也有其缺点。首先,由于FTP透露了很多关于正在传输的文件和谁在传输文件的信息,该协议没有提供任何内置的方法来加密客户端和服务器之间的连接。这意味着FTP流量很容易受到数据包嗅探和其他攻击,因为它是以纯文本发送的。 第二,FTP协议采用了一种过时的用户-密码方案来验证用户对服务器的身份。这意味着,如果你的用户名和密码被泄露,你的FTP账户就会被黑掉。 第三,与其他现代协议如SFTP(SSH文件传输协议)相比,该协议速度慢且效率低。它只是没有为快速文件传输而建立。 最后,FTP没有提供任何手段来同步本地和远程的文件。如果你正在寻找一种方法,将你的文件从服务器上的一个目录自动上传到另一个目录,而不需要手动启动这一过程,这可能是一个大问题。 安全文件传输协议的必要性 由于FTP存在许多问题,很明显,如果你想避免损害你的文件和数据的安全,你需要寻找一个安全的替代品。你应该考虑使用FTP的安全替代品,有很多原因。 1.避免嗅探和嗅探攻击 正如我们上面所说的,由于FTP流量是以纯文本形式发送的,你很容易被嗅探。这意味着,如果有人想访问你的文件或数据,他们可以拦截你的FTP流量并获得你的用户名和密码。如果你使用的是没有任何形式的加密的FTP,你的流量将以纯文本传输。任何人都可以使用标准的协议分析器查看它。 2.避免黑客攻击 如果你的用户名和密码被泄露,你的FTP账户将被入侵。一旦你的凭证被泄露,攻击者就可以通过FTP协议访问你服务器上的所有文件和目录。在某些情况下,这可能导致对你的文件和数据进行未经授权的更改。如果你在你的FTP服务器上存储敏感信息,这是一个巨大的安全风险。 3.避免低效的文件传输 正如我们上面提到的,与其他现代文件传输协议相比,FTP协议很慢。如果你想在互联网上快速发送文件,这并不理想。如果一个FTP服务器由于太多的用户同时上传文件而滞后,你可能被阻止访问自己的文件。 4.避免不可靠的文件同步 最后,FTP没有在你的服务器和本地目录之间提供任何形式的内置同步。如果你想从本地机器自动更新服务器上的目录,这可能是一个大问题。FTP只允许你向服务器上传文件,而不是从服务器上提取文件。 幸运的是,有许多方法可以在互联网上安全地传输文件。因此,如果你正在寻找一种比FTP更有效、更安全、更可靠的方式在互联网上传输文件,你有哪些选择? FTP的五个替代方案 1.SFTP SFTP是SSH文件传输协议的简称,是一个建立在SSH协议之上的FTP的安全替代品。这意味着SFTP对你的连接、登录和数据进行加密,以保证过程的安全。 使用SFTP是相当容易的。你可以通过你的FTP客户端使用它,或者直接在服务器上使用SFTP专用应用程序,如FileZilla,你可以免费下载。 SFTP也有其缺点。首先,它不像FTP那样广泛。有一些FTP客户端支持SFTP连接,但该协议仍然不如FTP普遍。 这也意味着,网站、服务器、路由器、交换机、防火墙和其他设备对SFTP的支持并不普遍。正因为如此,一些FTP客户端不支持SFTP连接。 2.FTPS FTPS是一个安全的FTP协议。它建立在现有的FTP协议之上,并增加了TLS/SSL加密,以确保客户端和服务器之间的连接。 为了做到这一点,FTPS默认使用990端口来加密客户端和服务器之间的FTP通信。这意味着,你可以在同一台服务器上同时使用SFTP和FTPS,但由于它使用990端口,FTPS仍然容易受到暴力攻击。 3.AS2 AS2是Application Exchange 2的缩写,是由IBM开发的专有协议。它不是开源的,而且IBM对其使用收费。 AS2不像其他安全的FTP替代方案那样广泛,但它已被世界各地的许多组织用来传输敏感数据。 AS2很复杂,与FTP非常不同。在IBM软件之外,它不容易使用,但它被全球的IBM客户广泛使用。 AS2的缺点是没有标准的、开源的协议实现,这意味着你需要使用IBM AS2工具箱来在你的电脑、服务器、路由器、防火墙和其他设备上使用它。 4.HTTPS HTTPS是指超文本传输协议安全。它是建立在HTTP协议上的一个协议,通过SSL/TLS确保网络流量。 它被网站、浏览器、服务器、网络设备和其他类型的互联网连接设备广泛使用。 HTTPS使用443端口,该端口通常在防火墙、路由器和交换机上开放。这使得你通过HTTPS传输文件比其他协议如SFTP、FTPS和AS2更容易。 HTTPS是一种流行的协议,广泛用于所有类型的数据传输,如通信或文件传输,能够对数据进行加密以获得额外的安全。 5.MFT MFT是另一个由IBM开发的专有协议。它经常被看作是AS2的替代品,但它在IBM客户中没有同样广泛的使用。 你可以使用MFT在服务器之间安全地传输文件,但它不像AS2那样广泛。和AS2一样,MFT也没有开源的实现。 至于MFT的缺点,它没有被防火墙、路由器和交换机等网络设备广泛支持。网络管理员还需要在这些设备上配置1433端口以使用MFT连接。 总结 有许多FTP的安全替代品。但每一种都有自己的缺点,这意味着你需要根据你的具体需要选择合适的替代方案。在选择FTP的替代品之前,你需要做研究。 如果你的主要目标是将文件传入或传出你的服务器,那么HTTPS或MFT可能是你的正确选择。但如果你需要在服务器之间传输文件,AS2或FTPS可能是更好的选择。 你最终选择的那一种也将取决于你的预算,对每种协议的支持的可用性,以及你需要传输数据的频率。也就是说,重要的是要记住,没有安全的FTP替代品可以解决你所有的安全问题。 无论你选择什么方式,最好是在传输文件之前对其进行加密,以保证文件的安全。这将使它们在网上保持安全,即使有人设法拦截数据。 随着越来越多的公司迁移到云端,预计像SFTP、FTPS、AS2、MFT、HTTPS等安全文件传输协议将变得更加广泛。这将使系统管理员、开发人员和企业更容易在服务器之间安全地传输文件。 传输任何大小的文件 替代FTP的安全文件共享 查看我们的付费计划
探索文件传输协议 三月, 2022二月 16, 2022 作者 ǞǞǞ 文件传输是互联网的组成部分。在每一天的每一分钟里,互联网的用户都在下载文件,并在整个虚拟世界中流通。文件传输协议(FTP)已经存在了四十多年,在这段时间里,它在加密标准和文件传输功能方面已经有了实质性的改进。 FTP的历史可以追溯到网络的早期,甚至早于1980年代早期基于TCP(传输控制协议)的当代互联网协议(IP)网络的诞生。 本文将探讨与FTP相关的大量维度,如功能、优势和劣势,同时也介绍FileMail作为一种可行的替代方案。 免费分享高达5GB的内容 不需要注册 立即发送大文件 什么是文件传输协议(FTP)? 文件传输协议(FTP)代表了一种标准的通信协议,用于在计算机网络上将计算机文件从服务器传输到客户端。FTP是一个客户-服务器协议,利用客户和服务器之间不同的控制和数据连接。 FTP是一个客户-服务器网络协议,使用户能够从其他服务中下载网页、数据和应用程序。当用户想把数据下载到他们自己的电脑上时,他们使用FTP来完成。 此外,FTP是不加密的。它使用明文用户和密码进行认证,使通过FTP传输的数据容易受到窃听、冒充和其他攻击。 FTP是如何工作的? 文件传输协议以客户-服务器模式运作,文件传输功能由一个FTP服务器和一个FTP客户进行。一个FTP连接需要双方在指定的网络上创建和互动才能开始。虽然用户必须有权力向FTP服务器提供凭证,但一些公共FTP服务器不需要用户提供密码来访问文件。 在网络上设置了一个FTP服务器,并将一个指定的文件存储位置(文件夹/系统)定义为要共享的数据的共享存储位置。终端用户将使用FTP连接到该文件服务器,将文件传输到他们的本地文件夹/系统。 FTP需要一个TCP/IP网络和使用一个或多个FTP客户端才能发挥作用。FTP客户作为客户和服务器之间的通信代理,下载和上传文件。从本质上讲,FTP客户端发起与FTP服务器的连接。FTP服务器在收到客户上传或下载文件的请求后开始文件传输程序。 每当用户遇到问题时,他或她必须创建一个命令通道和数据通道。在配置了这两个通道后,被动模式指示服务器监听连接,而不是试图与用户重新连接。 FTP是用来做什么的? 继续支持FTP下载和传输的平台主要是出于习惯,甚至这种情况也越来越少。 FTP是一种非正式的方法,在进入更复杂的版本之前让新手接触互联网协议,使其成为一个优秀的入门工具。一些人创建FTP文件系统是出于怀旧或只是为了好玩。在一个组织内部传输大量的服务器文件。一些IT专业人员在封闭系统内传输服务器文件时可能会利用FTP。 此外,FTP在建筑、工程和施工(AEC)业务中被广泛用于交换建筑原理图和组件。在AEC业务中经常使用的CAD或SketchUp图表等巨大文件的理想发送方法是通过FTP服务器。 处理CAD图和类似文件格式的建筑和相关行业,由于文件传输速度的原因,经常依赖FTP。 FTP客户端 每个FTP客户端都有独特的功能,使用户能够定制其上传和下载过程。在一个FTP客户端中需要寻找的其他功能包括公钥认证、文件压缩级别控制以及使用文件掩码搜索服务器的工具。 FTP的安全问题 总的来说,作为一种数据传输方法,FTP本质上是不安全的。当一个文件通过该协议发送时,数据、登录名和密码都是以纯文本形式交换的,这意味着黑客可能很容易得到这些信息。为了保证你的数据安全,你必须利用FTP的改进版本,如FTPS或SFTP。 FTP可以追溯到网络安全不过是一个猜测的话题时。这意味着FTP的传输是不安全的,使得任何有能力进行数据包嗅探的人都可以合理地简单地截获数据。 如果黑客能够截获FTP传输,他们将不会受到加密的阻碍,无法访问或修改内容。即使你利用FTP云存储,如果服务提供商的系统被黑客入侵,数据也可能被拦截和滥用。 因此,通过FTP传输的数据成为欺骗、嗅探、暴力和其他类型攻击的理想目标。黑客可能会检查一个FTP交易,并试图使用基本的端口扫描来攻击其弱点。 FTP的劣势 具有挑战性的使用情况 说FTP无法访问是一种轻描淡写的说法。它的界面让人害怕,也让人难以忍受。乍一看(以及随后的几眼),它似乎是只有IT专家才能理解的东西。这是一个显著的缺点,因为它需要对你的人员和你的客户进行培训才能正常运行。 不是每个供应商都是平等的 企业选择托管由供应商管理的FTP解决方案,以解决安全漏洞的问题。不幸的是,并非所有供应商都通过了必要的安全测试,因此很难找到合适的供应商。每个对手都提供了一套独特的功能,其中许多在访问限制、安全、可用性和价格选择等关键领域都有所欠缺。 加密不是必然的结果 虽然有可能找到一个提供数据加密的供应商,但许多人并没有这样做。FTP不包括加密,这解释了为什么传输的数据如此容易被截获。此外,在研究一个FTP服务时,你会发现加密并不总是被给予或执行。 FTP可以被攻击 如果你选择了一个不正确的供应商,你就有可能得到一个不能保护你的数据的FTP解决方案,使你受到黑客策略的攻击,如暴力攻击或欺骗攻击。黑客利用暴力攻击来进入你的系统,快速通过成千上万的登录和密码组合。FTP很容易受到欺骗性攻击,即黑客冒充网络上的真正用户或设备。 合规是一个问题 此外,在通过FTP发送数据时,你应该考虑合规性。FTP本身或通过一个不安全的FTP供应商可能会使你的公司面临不合规的指控。缺乏加密是导致不合规的一个重要因素,你必须确定一个适合你合规要求的解决方案。 监测活动是困难的 FTP不提供审计跟踪,因此很难追查泄漏源或监控项目进展。因此,如果文件被滥用,或出现数据泄露,你可能难以追踪问题的来源。众多的FTP客户端缺乏必要的访问限制,以保证你的员工遵循文件共享的最佳实践。 FTP的优势 可同时传输多个文件目录 如果你的公司希望你一次性交换大量的数据(考虑到TB,而不是兆字节),FTP是一个很好的选择。工程师、建筑师和图形设计师经常有巨大的文件,这些文件太大,无法通过电子邮件发送,而使用HTTPS共享又太慢。在这些情况下,FTP提供了一个重要的好处,因为它允许更快地传输大量的文件。 永远不会失去对你的文件传输进度的跟踪 它的优势在于,如果你在使用FTP时失去了与网络的连接,你不必担心丢失你的传输进度。如果你失去连接或需要重新启动机器,你不必重新开始。你可以在你离开的地方继续。当网络变得可以访问时,FTP将立即重新加入并恢复到它离开的地方。 文件邮件。FTP的可行替代方案 尽管如此,也有可行的替代方案,可以克服FTP带来的挑战,并带来额外的功能和优势。Filemail是一个网络平台,能够使用各种应用程序和服务来发送和接收任何大小的巨大文件。 这是一项免费服务,任何人都可以使用。其基本原理很简单:选择一个文件,填写收件人的电子邮件地址,然后点击 "发送"。接收者会收到你的文件的链接并下载它。 超越了FTP的安全漏洞,有了Filemail,你可以为你的文件传输指定可用期限和密码保护,这使它更安全。它还配有安全措施,使你的文件传输更加安全,这是FTP所无法比拟的。 两套防火墙保护你的服务器,对数据的访问直接通过Windows访问保持。在磁盘上,文件名是加密的,服务器上的大量数据使得检索和解密硬盘上的数据几乎是困难的。 分享任何大小的文件 FTP的安全替代品 查看我们的付费计划
如何将文件从PC转移到PC 十月 19, 2022一月 27, 2022 作者 ǞǞǞ 没有什么比购买一台闪亮的新电脑更让人兴奋了。通常情况下,购买一台新电脑需要获得一系列的新功能,增强处理能力,改进图形,增加存储。 当然,如果你要搬到一台新的电脑上,并取代旧的电脑,你可能希望转移更多的文件。理想情况下,你应该转移所有的文件、图像、整个用户资料、账户、收藏夹、书签和电子邮件,换句话说,你拥有和使用的一切。那么,如何 转移文件 从PC到PC? 有几个变量会影响这个过程,包括要传输的文件数量、文件大小和两台计算机的操作系统。 虽然文件传输不是一个复杂的操作,但可能需要几个小时,这取决于你需要传输的数据量。以下是六种最常用的策略,你可以自己尝试。 免费传输高达5GB 不需要注册 现在传输文件 1.外部存储设备 众所周知,大多数人利用外部驱动器。将U盘中的数据从一台电脑复制到另一台电脑上,再将同一个驱动器连接到第二台电脑上,然后再次复制数据,这是很简单的。 另外,如果你的数据超过了闪存驱动器的容量,你可以利用一个外部硬盘驱动器。如果两台笔记本电脑都配备了USB 3.0端口,你可能要考虑购买一个最快的闪存驱动器。当处理大量的数据时,速度变得至关重要 当出于备份原因使用外部硬盘时,有许多因素需要考虑,因为某些硬盘可能偶尔会出现文件传输故障:利用高质量的电缆(内部硬盘也是如此),必要时使用高质量的USB枢纽。 一些USB控制器在重载下也会变得不稳定,所以如果你的硬盘连接有问题,你可能需要更换个别部件以确定问题的来源。 优点 弊端 便携式 - 外置硬盘是便携式的,即插即用。它可以作为任何支持USB或FireWire的计算机的存储设备。 数据丢失 - 外置硬盘和内置硬盘一样容易发生数据丢失。外部硬盘很容易受到病毒和恶意软件的攻击。此外,它们很容易受到阳光、热量、湿度、液体、灰尘和磁场的影响而退化。 紧急使用 - 你可以利用外部硬盘驱动器作为紧急情况下的备份盘。因为硬盘有时会出现故障,无论你是出于商业还是个人目的而依赖电脑,保持备份是至关重要的。 易受侵害 - 大多数外部硬盘都有密码保护。如果你的硬盘或闪存驱动器丢失或被盗,任何将该设备放入计算机的人都可能访问你的数据。 提高性能 - 通过使用外置硬盘作为主要存储设备,你可能会大大改善具有较慢内部硬盘的Mac的性能。 难以设置 - 在外部硬盘上设置文件版本是很困难的。如果你每天将你的文件备份到外部硬盘驱动器,你往往只能依靠一个备份,而不是许多文件版本。 2.内部SSD和HDD驱动器 如果你从一台旧电脑迁移到一台较新的电脑,你的旧电脑可能变得无法使用。另外,你可能会用一个新的硬盘替换一个旧的硬盘。然而,你怎么能得到你以前的数据呢? 硬盘驱动器(HDD)和某些固态驱动器(SSD)是通过标准的SATA连接到主板上的。如果你有的话,把你的旧硬盘连接到一个备用的SATA或eSATA(外部SATA)连接器。它将被操作系统识别为一个新的驱动器。然后开始传输。这是所有可能的选项中最快的。 优点 弊端 内部硬盘的容量很大,可以存储大量的数据。此外,内部硬盘在任何时候都与你的计算机密不可分。因此,定期安排备份需要较少的工作。与其他媒体存储类型相比,内部硬盘驱动器非常具有成本效益。 有限的预期寿命 - 每个固态硬盘的读写周期都是有限的。这被称为TBW(TBW)。当你购买一块固态硬盘时,它有一个预设的 "死亡时间",它受到硬盘使用频率的影响。 3.使用传输电缆 你可以通过几个连接来传输数据,而不是使用基于云的服务或外部硬盘驱动器。因为数据是在个人电脑之间同步复制和粘贴的,这种方法往往比利用光盘更快。 虽然它可能看起来相当过时,但使用文件传输线仍然是在两台相互靠近的计算机之间传输信息的有效方法。 使用这个设备,你连接到两台电脑的USB端口,然后使用提供的文件传输软件,挑选文件和文件夹在它们之间传输。一旦你的设备通过USB端口连接,捆绑的传输程序将引导你完成文件和设置迁移过程。 如果两台电脑都有USB 3.0连接,数据传输将更快;当你开始文件迁移程序时,要记住这一点。 优点 弊端 速度 - 由于U盘不需要互联网连接,它们的传输速度相当快。另一方面,速度受到几个参数的影响,包括USB版本、硬件总线和USB控制器设备。 难以扩展 - 一旦交叉连接从一台计算机连接到下一台计算机,如果不增加更多的网络适配器,连接到任何其他计算机就变得很困难。 容量 - 最初,USB驱动器并没有提供广泛的存储容量。直到最近,才有了容量高达2TB的USB设备。因此,在拥有巨大存储容量的情况下,用户可以不必携带额外的硬件。 不值得信任 - 以这种方式链接的计算机会被自动归类为具有 "公共 "连接。公共连接默认禁用网络发现、文件共享和打印机共享。与通过交换机链接的计算机相比,共享这些资源变得更加费力,因为你必须在每台计算机的设置中手动重新启用这些功能。 物理尺寸 - USB闪存驱动器是紧凑和轻量级的,使它们非常便携。它们很适合放在口袋里和背包里。它是需要大量空间的硬盘和平板电脑的理想替代品。 4.通过Wi-Fi共享文件 大多数流行的操作系统都有一个配置家庭网络的选项。这使连接到同一路由器(通过以太网或Wi-Fi)的设备能够自动识别彼此。 因此,在计算机之间传输数据时,你不需要每次都建立一个新的连接;只要两台机器都打开了,连接就一直处于活动状态。 优点 弊端 不需要外部USB存储驱动器硬件 - 通常情况下,当我们希望在PC之间传输数据时,我们会寻找一个USB闪存驱动器或USB硬盘驱动器。通过Wi-Fi传输文件,不需要额外的设备在两台PC之间传输数据。所需的只是一个功能性的Wi-Fi连接。 必要带宽的问题 - 文件共享确实需要足够的带宽,以提供对数据的快速和方便的访问。如果你缺乏适当的速度,访问文件可能是一个耗时的过程。 快速文件传输 - 通过Wi-Fi共享文件可以在个人电脑之间更快传输文件。当Wi-Fi连接两台计算机时,可用于文件传输的带宽会大大增加。此外,将数据从一台电脑复制到外部驱动器并传输到另一台电脑所需的时间也会减少。文件通过Wi-Fi从一台电脑即时传输到另一台电脑,将所需时间减半。 公共访问 - 当文件被交换时,员工或外部黑客在网上的公共论坛上分享公司数据的机会增加。恶意软件、勒索软件和病毒更有可能攻击共享文件。例如,病毒可能会感染用于查看数据的工作站,然后将自己上传到你的服务器或拥有这些内容的其他工作站。 安全的数据传输 - 使用Wi-Fi传输数据可以保护你免受潜在的危险。利用闪存驱动器或内存驱动器可能对你的计算机性能不利,因为它们可能包含病毒或其他恶意软件。通过使用Wi-Fi来分享你想要的文件,你可以避免这种危险。 5.通过局域网从电脑到电脑传输文件 局域网电缆是最早通过以太网端口连接两台计算机来传输数据的一种。局域网电缆允许更快的数据传输,并与所有版本的Windows兼容。 局域网电缆避免了在你希望传输文件时插入和拔出笔式驱动器的需要。此外,你不需要依赖Wi-Fi。无论你想发送哪种数据,局域网电缆都能提供最快的传输速率,而使用Wi-Fi则不需要网络配置方面的高级技术知识。 优点 弊端 促进交流 - 使用局域网,用户可以很容易地分享信息和数据。由于数据存储在服务器上,因此可由局域网用户查看。每个局域网用户都可以与其他网络用户这样做。因此,这节省了时间,并保证通信被发送到适当的收件人。 实施成本 - 虽然局域网通过共享资源来节省资金,但建立网络的初始成本却相当高。这主要是由于需要专门的软件来创建服务器。此外,必须为初始设置购买路由器、集线器、交换机和电缆等物理设备。 数据集中化 - 拥有一个计算机网络可以使所有的信息存储在一个中心位置,并能被多个用户访问。这使同一团队的成员能够访问所有必要的资源,以履行其职责。 违反政策 - 由于与链接的计算机相关的所有数据都保存在一台服务器上,未经授权的人可以检查与所有连接的机器相关的浏览器历史和下载。 6.基于云的服务提供商 你可以使用各种云存储服务传输和下载文件,如Google Drive或OneDrive。 是什么让云存储对文件传输如此有利?因为这些基于云的服务使你能够下载和传输几乎任何大小的文件,这取决于可用的存储空间。此外,你可以使用在线应用程序上传更大的文件。 如果你以专业身份工作,你几乎肯定会被要求向位于世界各地的个人和组织传输文件。 文件邮件 在这种情况下就会派上用场。没有困难的准备工作,没有需要阅读的二维码,也没有需要经过的障碍。发送文件就像发送电子邮件一样简单。 Filemail应用程序使你能够使用一个简单的拖放界面发送任何大小的巨大文件到任何电子邮件地址。你也可以将文件上传到一个私人的URL,与他人分享。传输通过Filemail UDP协议得到加强,这使得它成为在互联网上发送巨大文件的最快速和最可靠的方法。 优点 弊端 成本 - 物理存储可能太昂贵了。云存储,不需要硬件,每GB的成本比外部驱动器低得多。 互联网连接 - 云存储需要一个互联网连接。如果你连接到一个迟缓的网络,访问你的存储可能会很困难。如果你没有连接到互联网,你将无法查看你的文件。 可访问性 - 通过将你的文件存储在云端,你可以从任何有互联网连接的地方访问它们。 费用 - 从云端上传和下载文件会产生额外费用。如果你经常访问许多文件,这些费用可能会迅速累积起来。 恢复 - 在硬盘故障或其他硬件问题的情况下,你可以访问云中的数据。它是用于本地存储的物理硬盘的一个备份选项。 隐私 - 当你利用云服务提供商时,你的数据不再实际存储在你的计算机上。因此,谁对数据的安全负责?这是一个灰色区域,目前正在澄清。 同步和保持你的设备最新 - 当你使用云存储时,你对文件所做的任何改变都会在你访问云的所有设备上自动同步和更新。 那么,哪种选择最适合你? 虽然得到一台新的电脑是令人兴奋的,但意识到你的所有信息仍然在旧的电脑上,就不那么令人兴奋了!毕竟,如何在电脑之间共享文件是任何一个电脑拥有者都必须的。毕竟,如何在个人电脑之间共享文件对任何电脑拥有者来说都是至关重要的。 目前,有许多选择可以将数据、应用程序和设置从你的旧电脑转移到新电脑。你可以从任何设备、任何地方访问你的数据,无论你是使用老式的闪存驱动器还是使用尖端的软件。 传输任何大小的文件 无限的收件人、下载和带宽 查看我们的付费计划
Gmail附件大小的限制以及如何分享绕过限制的文件 三月, 2022一月 27, 2022 作者 ǞǞǞ Gmail是谷歌的一项流行的电子邮件服务。自2004年推出以来,它已成为全世界最频繁使用的电子邮件服务之一。 Gmail简单易用的界面使其成为新的电子邮件用户的一个很好的选择,这解释了它的受欢迎程度。事实上,截至2021年底,Gmail的全球活跃用户数高达18亿。 然而,有可能阻碍其广泛使用的功能之一是对通过它发送和接收的电子邮件附件的限制。Gmail对可通过其服务器发送或接收的文件的附件大小限制,在分享大文件时可能会出现问题。 这种限制可能是一个问题,阻碍了 共享大文件 如电子表格、演示文稿、音乐曲目和视频。幸运的是,有一些方法可以绕过这个限制。 在这篇博文中,我们将探讨如何绕过这个大小限制,通过Gmail发送带有大附件的大邮件。让我们深入了解一下吧 免费发送高达5GB的文件 不需要注册 立即分享文件 为什么电子邮件有大小限制? Gmail对文件大小有此限制,主要有两个原因。 第一个原因是确保文件的上传或下载时间不会太长。考虑到上传一个1MB的文件大约需要14秒,通过电子邮件发送大文件最终可能会花费很多时间,这就是Gmail有这个限制的原因。 Gmail之所以有这样的大小限制,也是因为较大的文件可能包含病毒或恶意软件,如果你下载这些文件,可能会感染你的电脑。考虑到这些风险,Gmail限制了大文件的发送和接收,以确保其用户的安全。然而,有一些方法可以绕过这个大小限制。 顶级电子邮件供应商的电子邮件附件大小 顶级的免费电子邮件供应商,如Gmail、雅虎、Outlook和其他公司,都有通过其服务器发送或接收的文件大小限制。让我们看看在文件大小方面,各种服务提供商是如何与Gmail抗衡的。 电子邮件提供者 文件附件大小限制(MB) Outlook.com / Hotmail.com 34 Gmail.com 25 ProtonMail.com 25 Yahoo.com 25 AOL.com 25 邮件网 30 正如你从列表中看到的,有一个常见的25MB大小,几乎所有顶级的电子邮件供应商都对附件进行了规定。这是因为他们的服务器被配置成可以处理如此大的文件,他们希望保持一致。 然而,当涉及到电子邮件附件时,Gmail的限制是最低的之一。这就是为什么你通过Gmail发送大文件可能会遇到问题的原因。但不要灰心,因为有办法通过Gmail发送大邮件。 如何绕过Gmail的文件大小限制 有许多不同的方法可以通过Gmail发送大型邮件。你只需要知道正确的变通方法。让我们来看看一些你可以用来通过Gmail发送大文件的方法。 1.压缩你的文件 压缩你的文件以绕过Gmail的大小限制是最简单的方法之一。你只需要把你的文件压缩成ZIP或RAR格式,这样你就可以把它发送给你的Gmail联系人。当他们收到文件时,他们所要做的就是在打开它之前解压缩。这真的就这么简单。 要压缩你的文件,你所需要做的就是右键点击文件,并选择 "发送到">"压缩(zip)文件夹 "的选项。这将需要几秒钟的时间让文件得到压缩,你可以将它发送给你的Gmail联系人。一旦他们收到,他们需要做的就是右击文件并选择 "全部提取 "选项。 2.文件分割器 你也可以使用文件分割器来绕过Gmail的大小限制。文件分割器是一种应用程序,允许你将文件分割成较小的块状,并在单独的电子邮件中发送。 例如,你可以将一个25MB的文件分成5部分,每部分5MB,然后分5封邮件发送。这可以确保文件顺利到达你的目标收件人。 网上有许多不同的文件分割器,但找到最适合你的那一个是关键。选择文件分割器时要考虑的几件事是。 1.支持的文件格式你需要确保该文件分割器支持你的文件格式。它还应该能够处理大型文件,如视频和图像。 2.多封电子邮件 你应该寻找一个文件分割器,允许你快速分离并将大文件发送到多个电子邮件中。这样,在通过Gmail发送大文件时,你就不会遇到任何问题。 3.使用方便 使用文件分割器的全部意义在于使这一过程快速而简单。因此,你应该寻找一个文件分割器,使你的文件简单地分离成多个电子邮件。你也可以寻找一个免费的文件分割器,无需支付任何费用就可以使用。 3.云存储选项 云存储选项已迅速成为寻求分享大文件的用户的首选。通过Google Drive和Dropbox等云存储服务,你可以上传你的文件,并发送一个链接给你的收件人。然后他们可以从各自的云存储账户中下载该文件。 OneDrive OneDrive是目前最流行的云存储服务之一。OneDrive让你在一个地方存储、分享和同步你的工作或学校文件。你可以将你的文件保存到OneDrive,并从任何设备上访问它们。你可以与其他人分享OneDrive中的文件,无论他们在哪里。 谷歌驱动器 作为谷歌最受欢迎的服务之一,Google Drive使你能够在所有设备上存储和共享你的文件。你可以在云端创建、上传和编辑你的文件,甚至可以与他人合作,在一个文件上工作。你可以选择谷歌文档、表单、幻灯片和表格来创建你的文件。 滴答网 Dropbox让你存储和分享你的文件,包括照片。你可以定义谁看到每个文件或文件夹,并通过密码保持它们的隐私。Dropbox可以帮助你保护你的内容。 使用这些选项时,你不必担心文件的大小,因为它们是为处理大文件而设计的。 4.基于云的文件传输服务 如果你想与你的商业伙伴、朋友或家庭成员分享大型文件,使用基于云的文件传输服务可能是一个好主意。这些服务为你提供大量的云存储空间,与世界各地的其他用户分享你的文件。 基于云的文件传输服务就像云存储服务一样工作。你可以从任何设备上访问它们,当你在旅途中时,它们特别有用。有许多不同的服务,所以找到最适合你要求的服务可能有点挑战性。 这里有一些在选择基于云的文件传输服务时需要考虑的事情。 1.文件大小限制 确保你选择的文件传输服务支持你所有的文件,并且不限制文件的大小。在对你的文件使用之前,对文件传输服务进行测试也是一个好主意,因为有些服务可能会引起问题。 2.文件格式支持 你需要确保你选择的文件传输服务支持你所有的文件格式。它还应该能够处理大型文件,如视频和图像。 3.支持的通道 你应该确保你选择的文件传输服务支持你使用的通信渠道,如电子邮件和社交媒体。 4.安全和隐私功能 你应该寻找一个能让你发送安全文件的文件传输服务,提供端到端加密,并防止第三方截获你的文件。 5.价格 在选择文件传输服务之前,你应该考虑其定价计划。你不必为文件传输服务付费,但看一下它的定价结构很重要。 文件邮件 Filemail是最可行的选择之一,它可以让你通过电子邮件轻松而迅速地将大文件发送给任何人。Filemail是完全免费的,并允许你发送你想要的许多文件。 Filemail的免费版本有5GB的限制,但他们也有付费选项,允许你发送无限大小的文件。他们支持每一种格式。如果你正在寻找一种发送大文件而不担心存储空间的方法,请确保你检查一下Filemail。 总结 绕过Gmail附件大小的限制,当你试图向别人发送一个大于该大小的文件时,可能是一个真正的痛苦。好消息是,你总是有选择的,这取决于你要发送的是什么。 如果你的文件对Gmail来说太大,但对OneDrive、Dropbox、Google Drive或你使用的任何其他文件共享服务来说太小,那么Filemail是最好的选择之一。 Filemail让你通过电子邮件轻松快速地发送大文件,无论你的文件是什么格式。我们希望这篇文章能帮助你学会如何绕过Gmail的文件大小限制,并在必要时绕过它。谢谢你的阅读! 突破Gmail附件大小的限制 不浪费时间,使用分割器和压缩机 查看我们的付费计划
如何通过电子邮件发送大文件 十月 19, 2022一月 25, 2022 作者 ǞǞǞ 当你需要 发送大文件 通过电子邮件,当你收到一个弹出窗口,告诉你的文件太大,这可能是令人沮丧的。令人惊讶的是,大多数电子邮件服务器不能发送或接收超过特定大小的文件。不仅如此,仅仅因为你可以通过发件人的电子邮件服务器发送附件,并不一定意味着收件人的电子邮件可以接受它。你如何确保你发送的电子邮件附件是收件人可以打开的?请继续阅读,了解如何通过电子邮件发送大文件。 你需要确保在你发送电子邮件附件之前知道其大小。电子邮件服务器的大小限制不是一刀切的,每个供应商都有不同的限制。幸运的是,大多数电子邮件服务会在文件名旁边显示文件大小。 如果你要附加多个文件,你会想跟踪你的附件的总大小。如果文件大小显示为千字节,而不是兆字节,要知道,一兆字节中有1024个千字节。 许多企业和个人都在使用基于云的服务提供商和基于云的 文件传输服务 在通过电子邮件发送大文件时,可以绕过附件大小。 免费传输高达5GB 不需要注册 立即发送大文件 基于云的存储服务通过电子邮件发送大型文件 当你有大文件要通过电子邮件发送,但文件太大,更有效的解决方案之一是使用基于云的存储服务。像iCloud Mail Drop、OneDrive和Google Drive这样的云存储空间是通过电子邮件发送大型文件的绝佳方式。当你有高质量的图形、视频、演示文稿、数据或更多,你需要将其发送过去,云解决方案允许你将文件上传到云服务。然后发送链接,让你的收件人通过链接而不是附件访问该文件。如果这听起来令人生畏,一旦你掌握了它,就很容易。以下是你如何通过基于云的存储服务发送大型附件。 1.iCloud邮件投放与苹果邮件 使用iCloud账户,你被设置为使用Mail Drop,它允许你通过iCloud发送高达5GB的大文件。当你使用Mail Drop时,文件以加密的形式存储,并在30天内提供给收件人下载。 首先,你要确保从你的苹果邮件账户中启用Mail Drop。 1. 从你的Mac上打开Apple Mail,从菜单栏中选择Mail下的Preferences。2. 在 "账户 "选项卡下,选择你想启用 "邮件投放 "的账户。3. 勾选 "用邮件投递发送大型附件 "旁边的方框。4. 使用Apple Mail撰写一封新邮件,并确保文本光标放在你希望附件出现的位置。5. 选择文件,然后选择附加文件。选择你想附加的文件并点击选择文件。 如果你的附件超过了大小限制,Apple Mail会自动为你的收件人将文件上传到iCloud服务器。 优点 弊端 该附件被上传到iCloud,并包括一个安全链接。 Mail Drop只有5GB的限制,所以使用这种方法超过的部分都会失败。 该附件不计入你的iCloud存储总空间,只在云端保存30天。 有些附件不能很好地转移到其他操作系统,如Windows。 2.谷歌驱动器与Gmail Google Drive允许你发送不超过25MB的附件,接收不超过50MB的文件。通过Google Drive发送大文件需要你先上传,然后通过电子邮件发送。只需遵循这些简单的步骤。 1. 登录你的Gmail收件箱,选择屏幕左上角的 "撰写",开始撰写新邮件。 2. 从新信息弹出窗口底部的图标按钮中,选择Google Drive图标。将弹出一个对话框,允许你插入一个文件。3. 如果你还没有把你的文件上传到Google Drive,你可以在这个对话框中这样做。从顶部菜单中选择上传。你可以拖放你的大附件,或者你可以点击从你的设备上选择文件。选择 "上传",将文件添加到你的谷歌驱动器。4. 如果你的文件已经上传至你的Google Drive,你可以在你的Drive中搜索你的文件。突出显示该文件并点击插入按钮。 5. 请确保在你发送电子邮件之前设置权限,以确保你的收件人可以访问该文件。你的Gmail会做一个检查,以确保你的收件人可以为你访问该文件,并提示你在发送邮件前更新文件的共享设置。现在,附件链接将被添加到您的电子邮件中。 优点 弊端 文件共享很容易,而且有许多内置工具,可以轻松地与他人协作处理你的文件。 在没有密码保护的情况下分享文件,存在着潜在的安全风险。 在你与你的目标收件人分享之前,文件是私有的。 Google Drive对你的驱动器施加了上传限制,因此,如果你需要分享多个大文件到Google Drive,这种限制会让人感到沮丧。 你可以从任何地方访问你的文件。 3.OneDrive与Outlook 对于许多企业来说,他们的主要电子邮件服务是Outlook。OneDrive是一个很好的解决方案,可以通过Outlook的电子邮件发送大型文件。Outlook只允许最多33MB的附件。你需要确保在分享之前先将文件保存到你的One Drive中。以下是如何使用OneDrive通过电子邮件发送你的文件 1. 你要先登录你的OneDrive账户。2. 右键单击你想分享的文件。从下拉菜单中,选择共享。 3. 在弹出的框中,输入你想分享文件的人的电子邮件地址,并更新你想为文件设置的权限。这种方法会自动生成一封电子邮件,上面有查看大文件的链接。 4. 如果你想起草一个自定义的电子邮件,从弹出窗口左下方的复制链接按钮生成一个链接,而不是输入收件人的电子邮件来自动邀请。通过Outlook将链接粘贴到一个新的电子邮件中。 优点 弊端 你可以在OneDrive上存储任何文件,它有一个用户友好的界面,使你很容易通过电子邮件发送大文件。 OneDrive免费计划最多允许5GB的存储空间,额外的存储空间需要付费。 微软是一个成熟的企业,所以你知道他们是坚实、可靠的。 使用OneDrive时,安全是一个问题。 它只对传输中的数据进行加密,而不是对坐在那里的数据进行加密。 用户权限可以让人们改变不想要的文件。 基于云的文件传输服务,使用电子邮件发送大型文件 当云服务开始时,它们更多的是面向消费者,用于基于网络的电子邮件、社交媒体、照片和个人存储位置。随着云解决方案的发展和安全性的提高,云服务已经开放,允许整个网络基础设施在云中运行,包括文件传输。 对分享敏感文件和数据的安全共享过程的需求正在上升,越来越多的人采用基于云的文件传输服务。随着在家工作的员工的增加,必须有一个用户友好和安全的解决方案,使员工能够发送和接收大型数据文件。 你总是可以使用基于云的文件传输服务。 文件邮件 文件邮件 是众多提供服务的解决方案之一,它允许你在线发送和接收任何大小的文件。它具有安全功能,使你的文件传输安全,使你能够设置可用期限和设置密码保护。这有助于防止你的文件最终落入坏人手中。 使用Filemail很简单,允许你有两种选择来在线发送大文件。你可以直接发送,或通过生成一个链接并通过你选择的电子邮件平台发送。 1. 在Filemail网站上,选择添加文件按钮来选择你想发送的文件。 2. 如果你想以电子邮件形式发送,你选择 "以电子邮件形式发送 "选项卡,并使用你的电子邮件地址起草一份电子邮件来发送。3. 如果你希望使用你的主要电子邮件服务器,请选择 "以链接形式发送 "选项卡并复制链接。4. 将出现一个弹出窗口,允许你设置文件的可用性期限。 Filemail允许你 共享文件 最多可以免费使用5GB。有了付费账户,你可以得到更多的功能,如1TB的存储空间,添加标志或背景,非常适合小型企业。 这些方法是通过电子邮件发送大文件的一些最佳方式。你总是要确保你使用的是专门的安全云和传输工具。在发送或接收大型附件时,安全是最重要的问题之一。 始终确保只打开来自你认识和信任的人的附件,并确保它们来自上述任何一种安全方法。 发送任何尺寸的大文件 无限的收件人、下载和带宽 查看我们的付费计划
发送音频文件。快速分享音乐和歌曲的8种方法 十月 19, 2022六月 25, 2021 作者 ǞǞǞ 这篇文章涵盖了8种在线发送音频文件的方式。我们将考虑到专业人士使用的文件格式,以及普通大众使用的MP3格式。我们要看的解决方案是。电子邮件蓝牙WhatsApp脸书信使谷歌驱动器一个驱动器雲端服務文件邮件 免费传输高达5GB的音频文件 不需要注册 免费发送音频文件 最受欢迎的音频文件格式共享 所有类型的音频文件都在人与组织之间传输。在个人情况下,它可能是语音记录、歌曲和音乐文件。在专业方面,它可以是像画外音、声音效果、音乐和歌曲。 从事音频工作的专业人员会在以下情况下使用无损压缩或未压缩的格式 发送音频文件.这是因为他们需要保留声音的质量和保真度。他们通常使用的文件类型包括WAV、AIFF和FLAC。这种情况下的无损压缩是指Zip和RAR等文件类型。分享音频的非专业人士,当然在音乐和歌曲的情况下会使用无处不在的MP3。 流行的音频文件格式1分钟的典型文件大小 文件格式 千赫兹(kHz) 位深 文件大小(MB) WAV 44.1 16 10.09 AIFF 44.1 16 10.09 FLAC 44.1 16 5.58 MP3 44.1 128 kbps 0.914 如何发送音频文件 根据不同的格式,以及由此产生的文件大小,一些分享音频文件的方法比其他方法更适合。 1.电子邮件 转移MP3文件最简单的方法是通过邮寄给发送者。使用附件选项附加所需的音频文件,然后点击发送。 电子邮件服务提供者对你可以发送多大的附件有限制。通常情况下,大小为10MB至25MB,这取决于供应商的情况。你可以使用无损压缩,如Zip或RAR工具来减少文件大小。但即使如此,你发送大型音频文件的能力仍然受到严重阻碍。 用电子邮件发送音频文件的优点和缺点 优点 1.你要有一个电子邮件地址,以及附加和发送电子邮件的知识。 弊端 1.由于附件的大小限制,你不能发送高质量的音频文件,也不能发送很多文件。 2.蓝牙 蓝牙已经存在很多年了,而且经常出现在移动设备上。你不仅可以用它来连接各种外围设备,如扬声器和耳机,还可以用来传输文件。 如何使用蓝牙分享音频文件 1.在发送和接收设备上都启用蓝牙。2.将设备相互配对。3.选择你想分享的音频文件,并点击分享图标。4.选择蓝牙图标,然后按发送。5.收件人将不得不接受转让。 蓝牙文件共享的优点和缺点 优点 1.易于使用。2.无线,所以不需要乱用电线。3.蓝牙是一种流行的功能,经常出现在移动设备上,而且很容易安装到没有蓝牙的设备上。 弊端 1.传输速度慢意味着这不是一个发送大文件的可行方案。2.蓝牙不应该被用来传输高分辨率的音频。3.蓝牙传输只能在相距不超过100米的设备上进行。 3.WhatsApp WhatsApp是一个非常流行的信息传递应用程序,经常被用来分享图片、文件、视频和音频文件。 如何通过WhatsApp发送音频文件 1.转到你想分享的联系人2.点击消息框中的回形针图标。3.选择 "音频 "图标4.浏览到并选择所需的音频文件5.点击发送来传输文件 使用无线传输文件的优点和缺点 优点 1.快速和容易分享。2.一个流行的信息传递应用程序,所以很有可能该应用程序被安装在设备上。 弊端 1.双方都需要安装WhatsApp并在对方的联系人名单中。2.只能发送高达100MB的文件。3.使用WhatsApp录制的音频只能是16MB大小。4.WhatsApp会压缩音频文件,所以你会失去质量。5.由于iOS的限制,你不能用iPhone来分享音频文件。 4.脸书信使 脸书信使是一个免费的消息传递应用程序,让你与脸书上的朋友联系。除了能够发送聊天信息外,你还可以分享照片、视频和其他文件,包括音乐和歌曲。 如何通过WhatsApp发送音乐文件 1.在一台台式电脑上,登录Messenger。2.去找你想分享的人。3.点击 "+"图标,然后点击回形针图标。4.选择你想分享的文件。5.按 "Enter "键,发送该文件。 通过Facebook Messenger传输音频文件的优点和缺点 优点 1.它是免费下载的。2.它使用起来很简单。 弊端 1.只能从台式电脑发送文件。2.最大的文件大小只有150MB。3.传输速度慢。4.4. 隐私问题。 5.谷歌驱动器 如果你使用谷歌服务,如Gmail,那么你将拥有谷歌硬盘。Google Drive是一个基于云的托管和共享服务。你上传你的文件,然后与任何人分享链接。 如何用Google Drive分享音乐 1.转到 谷歌驱动器。 2.点击新建,并选择你要上传的文件。或者,你也可以拖放所需的文件。3.一旦上传,你右键点击文件,并选择分享选项。4.输入你想分享文件的人的电子邮件地址。 5.或者,你可以右键单击并选择获取链接。然后,你可以与别人分享链接,他们就可以下载该文件。 使用Google Drive分享音乐的优点和缺点 优点 1.免费,有付费选项。2.易于使用的界面。3.与谷歌生态系统中的其他产品紧密结合。4.多平台应用程序5.最大的文件大小为5TB。 弊端 1.在他们的免费层中只有15GB的存储空间。2.传输速度可能很慢。3.你需要有一个谷歌账户。4.隐私问题,因为谷歌会分析你的内容。5.没有文件的密码保护。6.如果你共享的文件被访问,没有通知。 6.一个驱动器 One Drive是微软的基于云的产品。与Google Drive类似,你上传一个文件,获得一个链接,并与你想分享的人分享。 如何使用One Drive来共享文件 1.转到 OneDrive。 2.点击靠近窗口顶部的 "上传"。3.导航并选择你想分享的音频文件,或者,你也可以拖放文件来代替。4.一旦文件被上传,你突出显示它,然后选择窗口顶部的分享选项。5.你可以选择获取文件的可共享链接,或通过电子邮件将链接发送给预定收件人。 使用一个驱动器传输文件的优点和缺点 优点 1.免费,有付费选项可供升级。2.与微软的许多产品紧密结合,包括在MS Office内的内置支持。3.多平台的应用程序。4.最大的文件大小为250GB。 弊端 1.你需要有一个与微软产品相关的账户,通常是Outlook、Hotmail或Live电子邮件地址。2.你只能得到5GB的免费存储空间。3.如果你共享的文件被访问,没有通知。 7.iCloud 如果你是苹果用户,你有一个额外的选择,即通过iCloud与其他苹果用户分享文件。 通过iCloud共享文件 1.通过点击 "带有向上箭头的云 "图标上传你的文件。2.进入你想要的文件并点击打开。3.一旦上传,你就会打开转移的文件。4.记下表明文件在iCloud中存储位置的URL。5.使用电子邮件或聊天应用程序与所需收件人分享该URL。 iCloud文件传输的优点和缺点 优点 1.免费,有付费选项。2.在苹果的生态系统中紧密结合3.最大的文件大小为50GB。 弊端 1.需要有一个苹果账户。2.与其他服务相比,分享文件不那么容易。3.只能得到5GB的免费存储空间。4.如果你共享的文件被访问,没有通知。 8.文件邮件 文件邮件 是一个基于云的在线共享服务,让你发送任何类型和大小的数据文件或文件夹。我们的桌面软件使用UDP传输加速,这比基于TCP的解决方案快得多,例如,你的浏览器。 我们有一个免费选项,你可以用它来发送,每天最多5GB。我们的免费选项不仅包括使用我们的网站,还包括我们所有的应用程序。你可以从安卓、iPhone、iPad、Mac和PC发送文件。 如何使用Filemail来免费发送音频文件 1.前往我们的 主页 或者如果你想使用一个应用程序,请到我们的 应用程序页面.2.你可以选择是否将其作为电子邮件发送,或者,收到一个下载链接,你可以通过其他方式分享。3.如果你是以电子邮件方式分享,请填写收件人和发件人的电子邮件字段。输入一个主题。如果你想的话,你也可以添加一条信息。4.单击 "添加文件 "或 "添加文件夹",或者,你也可以拖放预定的文件。5.单击 "发送"。文件将被上传到我们基于网络的服务。6.收件人将得到一个链接,他们可以用它来访问和下载共享文件。如果你选择以链接形式发送,你将得到一个URL链接,你可以在社交媒体、论坛、聊天软件中分享;选择权在你。 Filemail Free的优点和缺点 优点 1.它是免费的,有付费选项可以升级。2.任何音乐文件类型。3.当有人下载你的文件时获得通知。4.就像发送电子邮件一样简单。5.多平台的应用程序。6.快速传输率。 弊端 1.免费选项只允许你每天发送最多5GB。2.文件只储存7天。 发送音频文件,任何格式,任何大小,无限下载 分享高质量的音乐和歌曲,每月只需$10美元 查看我们的付费计划
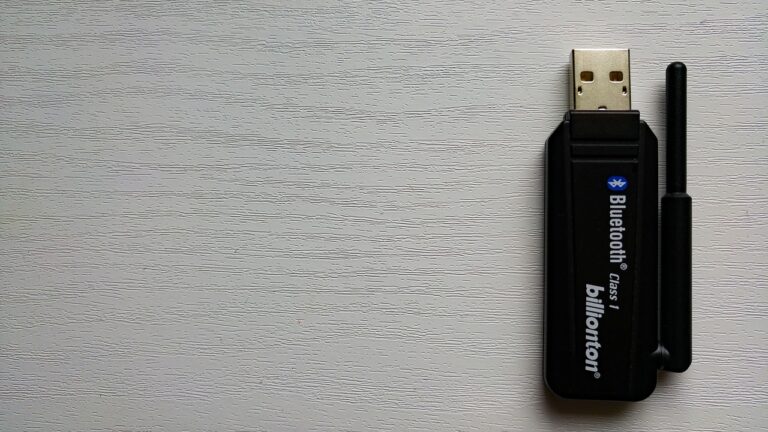
WiFi 文件传输 九月 25, 2023六月 24, 2021 作者 ǞǞǞ 在这篇文章中,我们将介绍如何 转移文件 使用WiFi文件传输应用程序。我们还将展示如何使用替代品,如Windows 10 Your Phone应用、Windows 10 Nearby Sharing、Apple AirDrop和Filemail。 免费传输高达5GB 不需要注册 现在发送文件 什么是WiFi文件传输? WiFi文件传输是一个解决方案,帮助你在连接到同一WiFi网络的设备之间共享文件。这意味着这些设备必须离彼此和路由器相当近。 这与WiFi Direct不同,后者不需要路由器。 WiFi文件传输的最好的部分是它不像蓝牙那样慢。 由于所有的Windows、苹果和安卓设备都可以连接到WiFi路由器,你可以在各种操作系统之间无线传输文件。 但你确实需要你的移动设备上的一些软件的协助来执行这个方法,而且这个过程可能很麻烦。 WiFi文件传输是如何工作的? 像ShareIt、Zapya和其他的应用程序以类似的方式工作,所以让我们看看其中的内容。 移动设备之间WiFi文件传输的基本前提 1.在两个移动设备上安装一个WiFi文件传输应用程序。2.在发送设备上,点击发送并选择你想分享的文件,再次点击发送。 3.遵循指示,通常会是关闭移动热点、打开蓝牙等内容。4.在接收设备上,点击 "接收",打开蓝牙。你会看到一个QR码。5.在发送设备上,扫描接收设备上显示的QR码。6.现在你可以发送所需的文件。 移动设备和计算机之间的WiFi文件传输 1.在移动设备上安装一个WiFi文件传输应用程序。2.在发送设备上,点击发送并选择你想分享的文件,再次点击发送。3.你会得到一个URL,你必须在你的电脑浏览器上进入该URL。4.在你的浏览器上,你会看到一个二维码,你必须用你的移动设备扫描。5.在你的电脑上,你会看到你分享的文件,下载它。 什么时候使用WiFi文件传输是最好的? 如果你想在不同平台之间进行本地文件传输,那么这种方法有其用途。它能完成在两个或更多跨平台设备之间共享文件的工作。你身上不需要有USB或Lightning转USB电缆,因为你可以使用无线连接。在某些情况下,你将不得不在发送和接收设备上安装一个应用程序。在接收设备进入特定的URL、扫描代码和其他方面有一些摆弄。 WiFi文件传输的替代物 有一些WiFi文件传输应用程序的替代品,其目的是在本地共享文件。如果你手头没有合适的USB线,或者你想使用无线网络共享,你可以使用。1.Windows 10 Your Phone应用程序。2.Windows 10附近的共享。3.AirDrop。 1.Windows 10您的手机应用程序 你可以使用 "你的手机 "应用程序将文件传入或传出Windows 10 PC与Android和iPhone。电脑和手机之间的连接是通过WiFi。 如何启动和运行 1.打开你的手机应用程序。2.你会被问到 "你的手机是什么类型的?"。选择安卓或iPhone。在这个例子中,我们将选择安卓。点击 "继续"。3.你会被告知在你的安卓手机上进入www.aka.ms/yourpc,并安装应用程序Your Phone Companion。或者你可以直接进入Google Play商店,并搜索Your Phone Companion - Link To Windows。4.一旦安装在你的手机上,你点击链接你的手机和电脑。5.在你的电脑上,勾选 "是的,我完成了安装Your Phone Companion",然后点击打开QR码。6.用你的手机扫描二维码。检查并接受各种许可要求。 你可以分享哪些类型的文件? 根据不同的手机,你将能够只分享你的图库中的图像,或者分享图库和我的文件中的图像。 如何使用你的手机应用程序将文件从安卓手机传输到电脑上 1.在电脑上的 "你的电话 "应用程序中,点击 "应用程序",然后点击 "电话屏幕"。2.进入你想复制到安卓手机的文件。3.将所需的文件拖放到 "你的手机 "应用程序的手机屏幕上。 如何使用你的手机应用程序将文件从PC传输到Android 1.在你的电脑上打开电话屏幕。2.导航到 "画廊 "或 "我的文件"。3.从手机屏幕上拖放所需的文件到你的电脑。 优点 1.在一些安卓设备和Windows 10之间进行本地共享很容易。2.可以同时上传或下载多个文件。 弊端 1.电脑必须有Windows 10 2019年5月的更新。2.支持Direct X 11的显卡。3.安卓设备必须运行安卓9.0或更高版本。4.你必须在某些设备上安装Your Phone Companion - Link To Windows应用程序。5.由于需要连接到相同的WiFi,无法远距离共享文件。6.文件不能大于512MB。7.iPhone没有得到正常支持。8.根据你的设备,你可能只能分享图像。 2.Windows 10附近的共享 附近共享可以帮助你使用Wi-Fi或蓝牙在PC之间共享文件。 使用Windows 10附近的共享来分享文件 1.确保你的设备都打开了WiFi和蓝牙功能。此外,断开与任何网络的连接,包括互联网,以开始与另一台计算机共享文件。2.进入开始>设置>系统。3.在窗口左侧接近底部的位置,你会看到 "共享经验"。4.到Windows桌面屏幕的右下方,打开行动中心(以信息云图标为标志)。 5.单击 "附近的共享 "并将其打开。在你的另一台Windows电脑上重复同样的过程。6.从文件资源管理器中,找到并选择你想共享的一个或多个文件。在选择的文件上点击右键,然后点击共享。7.对于网络链接,使用Microsoft Edge进入你想分享的网站。点击设置和更多,然后点击分享。8.选择你想分享数据的计算机的名称。9.在你的另一台Windows设备上,在屏幕上弹出的通知上点击保存,你的传输就完成了。 使用Windows 10附近共享的优点和缺点 优点 1.在个人电脑之间快速而方便地共享数据。2.文件传输的安全方法。在设置中,你可以挑选哪些设备是你可见的。 3.你不需要互联网连接或WiFi路由器来进行这种转移。 弊端 1.电脑必须有Windows 10 2019年5月的更新。2.支持Direct X 11的显卡。3.附近的共享功能只允许你在Windows计算机之间共享文件。 4.由于WiFi连接的范围较小,该方法不能覆盖很远的距离。 3.苹果AirDrop 如果你是一个iPhone用户,你一定听说过AirDrop。 Airdrop是苹果独有的功能,让你在iPhone、Mac和iPad之间分享文件。 凭借Airdrop的灵活性,你可以轻松地将你的所有数据传输到你选择的任何苹果设备。而且该应用程序不仅适用于照片和视频。你可以分享文本、地点、网站链接,以及更多。 如何在iPhone上使用AirDrop共享文件 1.进入你手机的控制中心,打开蓝牙和WiFi。同时,点击AirDrop图标,将其打开。2.选择你想发送的文件,然后按屏幕左下方的分享按钮。 3.你周围任何活跃的苹果设备都会在你的手机上显示出来。点选你想分享数据的那个设备。 4.接受你另一设备上的文件,传输就完成了。 如何在Mac上使用AirDrop传输文件 1.选择你所选择的文件,在你的应用程序窗口中点击分享选项。2.现在从屏幕上出现的所有选项中选择相关的文件收件人。3.当你收到文件传输的通知时,在你的另一设备上点击接受。 使用AirDrop共享文件的优点和缺点 优点 1.有一个专门的免费应用来传输文件,可以很容易地在各种设备之间发送和接收文件。2.有了AirDrop,你可以轻松地发送或接收任何文件,无论其大小如何。这使得在设备之间传输大型照片和视频文件特别方便。3.你不需要连接任何电线。只要你的所有设备都在附近,你就可以传输任何你喜欢的文件。4.苹果公司标志性的文件共享应用程序不仅是免费的,而且也是安全的,不会受到黑客的攻击。它不断地更新,以保证你和你的数据安全。 弊端 1.由于该应用程序使用蓝牙和WiFi技术,你可以在超过30英尺的距离内分享文件。2.AirDrop与非苹果设备不兼容。另外,iPhone没有蓝牙文件共享的常规Android功能。这意味着你不能用这个应用程序向你的Windows PC传输任何东西。3.如果你有一台2010年以前的旧设备,你就不能使用AirDrop无线功能。 文件邮件。WiFi文件传输的替代品 当两台设备相互靠近且文件大小较小时,WiFi甚至蓝牙都能完美工作。但你如何将文件传输到更远的设备上?或者与不共享同一无线网络的朋友和家人以无线方式发送文件?当然,以专业身份,你将经常需要向分布在全球的人和组织发送文件。这就是Filemail出现的原因。没有复杂的设置,没有扫描QR码,没有跳过障碍。发送文件就像发送电子邮件一样简单。 如何使用Filemail发送文件 转到 文件邮件.com 并遵循这些简单的步骤。1.在主页上,在收件人栏中输入收件人的电子邮件地址。2.在发件人一栏中写上你的电子邮件地址。然后键入你的电子邮件的主题。此外,如果你愿意,还可以添加一个信息。3.点击 "添加文件",挑选单个文件进行传输。或者点击添加文件夹来发送整个文件夹的数据。4.点击发送。你的文件将被上传到Filemail的云端。5.收件人将收到一封电子邮件,其中有下载共享文件的链接。或者你可以得到一个安全链接,并以你想要的方式分享。 使用Filemail分享高质量的照片的好处 优点 1.发送高达5GB的免费有了Filemail,你可以在不支付一分钱的情况下发送和接收数据。2.易于使用的界面该应用程序有一个用户友好的界面,易于使用和理解。 3.收件人不需要Filemail在接收端的人不需要安装任何应用程序。 4.在所有平台上我们有适用于安卓、iOS、Windows和Mac电脑的应用程序,以及一个基于浏览器的应用程序。这意味着,你可以使用同一个软件来传输你所有的文件,到任何设备,无论远近。 弊端 1.它需要互联网这种方法唯一真正的缺点是,你需要一个稳定的网络连接来使用它。发送方和接收方都必须有一个强大的网络连接,以分别上传和下载文件。 任何文件大小,任何文件类型,1TB存储空间 桌面应用程序的传输速度是浏览器无法比拟的 查看我们的付费计划
如何发送高质量的照片。6种免费方法 十月 19, 2022六月 23, 2021 作者 ǞǞǞ 这篇文章提到了6种方法,你可以用来发送高质量的照片而不损失质量。这些方法是电子邮件蓝牙 空投 Wi-Fi Direct 谷歌照片文件邮件。文件共享应用程序如果你想 共享文件 使用USB电缆或SD卡,那么请查看我们的文章,关于 如何将文件从手机传输到电脑. 分享高达5GB的高分辨率图片 免费 不需要注册 免费上传图片 发送高质量图片的问题 想象一下,作为一个使用高分辨率图像的摄影师。如果你想在互联网上上传你的作品,你会去哪里?如果你想给你的客户发送高质量的照片,你会用什么? 有许多解决方案,你可以用来发送照片。但是,当涉及到发送高质量的照片时,这些解决方案中的一些会带来它们自己的一系列问题。 上传的图像由于自动被压缩或转换为有损的文件格式而遭受质量损失 由于文件大小限制,无法上传大文件 你不能上传某些文件类型 无法在大范围内分享文件 不仅仅是摄影师要规避这些问题,那些从事高分辨率图片工作的人也是如此。无数的电子商务企业只需要高分辨率的摄影作品,这样他们就能以访客和买家要求的方式展示他们销售的产品。 说了这么多,你可以用什么方法来发送高分辨率的图像? 发送高质量照片的6种方法 有许多方法可以分享高质量的照片,每种方法都有优点和缺点。让我们仔细看一下每种方法。 1.电子邮件 电子邮件并不是为发送照片而设计的,但如果图像文件在最大附件尺寸以下,就可以使用它。主要的免费电子邮件供应商的典型附件尺寸如下。 电子邮件提供者 最大的文件附件尺寸 Gmail 25 MB 微软Exchange服务器 10MB 展望 20 MB 如何在不影响质量的情况下用电子邮件发送照片 1.点击 "新建邮件 "或 "撰写"。2.输入预定收件人的电子邮件地址。3.填写主题,和可选的正文。4.单击 "附加文件",并选择你要发送的图像。5.准备好后点击发送按钮。 如果从个人电脑发送,你可以将多张图片压缩成一个单一的存档文件,如Zip或RAR文件。然后你通过附件选项附上该档案,就可以了。如果你打算通过智能手机上的电子邮件发送照片,你可以直接进入你的画廊,选择你想发送的图片。当你选择分享选项时,菜单将显示各种方法。其中一种方法将是通过与你的手机相连的主要电子邮件账户。你仍然需要填写收件人的电子邮件地址、主题行和可选的正文。 使用电子邮件分享图片的优点和缺点 优点 1.发送图像就像发送电子邮件一样简单。2.多张图片可以作为附件发送,也可以压缩成一个文件夹。 弊端 1.电子邮件附件的大小可以禁止发送大型图片。2.一些电子邮件客户和供应商会自动压缩或调整图像大小。3.发送大量的图片会很费力和费时。 2.蓝牙 蓝牙曾经是多年来主要的图像共享方式。这是发送高质量照片的最简单选择,当然是在与朋友和家人分享时。大多数智能手机都配备了蓝牙,你也可以在你的电脑上安装一个蓝牙加密狗来分享高质量的图像。 如何在不影响质量的情况下通过蓝牙发送照片 1.在你想发送图像的设备上打开蓝牙。 2.接收器也必须打开蓝牙。3.然后你需要对设备进行配对。i) PC作为发送设备a.进入开始>设置>设备>蓝牙和其他设备。b.单击 "添加蓝牙或其他设备"。c.选择蓝牙。d.在下一个屏幕上,你会看到你的接收设备被列出,点击它。e.在你的接收设备上点击配对,在你的电脑上点击连接。ii) 安卓手机作为发送设备a.转到设置>蓝牙。b.在 "可用设备 "下查看,看到你的接收设备被列出,点击它。c.你会在你的电脑上收到一个通知。添加一个设备,点选来设置你的[设备名称]。d.在你的手机上点击 "付费",在你的电脑上点击 "连接"。4.转到你想分享的图片。i) 从PC上分享图像 a.在图像上点击右键,选择发送至>蓝牙设备。 b.选择列出的接收设备,并点击下一步。 c.在你的手机上点击接受。二)从你的手机分享图像a.点击 "分享 "图标。b.滚动到蓝牙图标。c.在 "选择蓝牙设备 "屏幕上,点击你的电脑名称。d.在你的电脑上确认你要接收该文件。 使用蓝牙共享图像的优点和缺点 优点 1.存在于移动设备、打印机和许多其他小工具上的通用技术。 2.如果你的设备上已经有了它,就可以免费使用,如果没有,安装起来也很便宜。3.该技术是无线的;因此你不需要互联网连接。4.你可以在分享文件时保持图像质量不变。 弊端 1.设备需要相互靠近,最大距离是相互之间的100米左右。2.带宽低,传输速度较慢,最高可达25Mbps。3.每次发送图片的效率很低。 3.空投 Airdrop是一个苹果用户可以使用的文件共享服务。它可以用来在所有类型的苹果设备之间分享图像,如iPhone、iPad和MacBook。 它是一种无线传输服务,同时使用Wi-Fi和蓝牙。你可以 短距离传输文件,所以接收器不能超过30英尺远。 如何使用AirDrop发送高质量的照片 1.打开你的iPhone上的控制中心。点击AirDrop图标,选择 "仅限联系人 "或 "所有人"。2.之后,打开Wi-Fi和蓝牙,如果它们没有自动打开的话。 3.接收器也需要启用AirDrop,并打开Wi-Fi和蓝牙。 4.转到你想分享的图像,并选择分享选项。5.在AirDrop选项下,你可以选择你想分享图片的人。6.接收方将需要接受正在传输的文件。 使用AirDrop传输图片的优点和缺点 优点 1.图像大小保持不变。2.它是一种快速的服务。3.AirDrop使分享文件变得容易. 弊端 1.只针对苹果用户,这意味着iPhone、Mac、iPad等设备。2.这些设备应该在每个人附近,否则,服务就不工作了。3.如果蓝牙和Wi-Fi都没有打开,AirDrop就不会工作。 4.Wi-Fi Direct Wi-Fi Direct有时被称为Wi-Fi P2P,是一种无线通信技术,使两个设备能够建立直接连接并共享文件。该技术使浏览和文件共享成为可能,无需互联网连接,也无需Wi-Fi路由器。你可以使用Wi-Fi Direct在设备之间分享高分辨率的图像。它就像蓝牙一样,虽然传输速率更快,而且你不需要对设备进行配对。 如何使用Wi-Fi Direct来发送高质量的照片 1.在安卓系统中,进入设置>Wi-Fi,向下滚动并点击附加设置。 2.选择Wi-Fi Direct。如果它不可用,你就需要打开Wi-Fi和GPS定位。 3.记下网络名称和密码。 4.在你的电脑上,进入设置>网络和互联网。 5.选择Wi-Fi > 管理已知的网络,然后添加一个新的网络。 6.输入网络名称,和安全密钥(密码)。你的电脑和安卓系统现在已经连接。 使用Wi-Fi Direct共享的优点和缺点 优点 1.使用WPA2协议进行安全连接。2.设备之间的直接连接和通信。3.一个Wi-Fi Direct设备可以与没有Wi-Fi Direct功能的传统Wi-Fi设备一起工作。4.传输速率可以达到250Mbps,比蓝牙快。 5.不需要互联网连接。 弊端 1.你只能与附近的收件人分享数据。2.与其他解决方案相比,耗电量相对较高。3.Wi-Fi Direct在苹果设备上不可用,所以你不能用这种方法在苹果和非苹果设备之间分享文件。4.不像蓝牙那样普及。 5.谷歌照片 谷歌照片应用程序是一个基于云的应用程序,你可以用它来上传和管理你的图像。你还可以用它作为备份存储,以释放你的智能手机和电脑上的空间。 如何使用谷歌照片发送高质量的照片 1.转到你想分享的相册或照片。 2.点击分享图标(三个相连的圆点)。3.选择所需的分享选项,如你想分享的人的联系人姓名、电子邮件地址或电话号码。 使用谷歌照片共享图片的优点和缺点 优点 1.无广告。2.与安卓系统紧密结合。3.免费存储空间高达15GB,但这是与Google Drive共享的。 弊端 1.图片的最大文件大小为16MB,这对于分享非常高分辨率图片的人来说可能是不够的。2.与谷歌的产品和服务一样,存在着隐私问题。 6.Filemail。用于发送高质量的照片 文件共享应用程序是基于云的服务。它们都在一个基本前提下运作,即你通过其网站或应用程序上传文件,如图片、视频和文件。这些文件被储存在他们的云中。你的目标收件人会得到一个链接,他们用这个链接来访问和下载文件。文件共享服务通常会提供有限的免费服务,付费计划则提供更多的功能。 文件邮件 就是这样一个文件共享服务,我们还提供有限的免费服务。你可以免费发送高达5GB的文件,对接收者的数量和下载次数没有限制。 使用Filemail分享高质量的图片的步骤 用Filemail发送文件就像使用电子邮件一样简单。你可以通过以下方式分享图片。1.附上你想分享的文件或文件夹,或者,你可以拖放图片。2.添加收件人的电子邮件地址。3.给你的信息添加一个主题。4.填写你的信息的正文,尽管这是可选的。5.单击 "发送"。你的收件人会收到一封电子邮件,给他们一个下载链接,所以他们可以访问你分享的所有文件。或者你可以以任何方式分享下载链接,通过WhatsApp、论坛、社交媒体等。 使用Filemail分享高质量的照片的好处 使用Filemail,你可以。1.上传任何文件类型,JPG、BMP、TIF、PSD,你说什么,Filemail都可以接受。2.Filemail不会对你上传的任何图片进行压缩或转换。3.作为一个基于云的解决方案,你可以将照片传输到任何其他支持互联网的设备。4.使用付费计划,你可以上传和分享25GB至任何文件大小的图像。你不需要降低原始图片的分辨率。 适用于所有平台的应用程序,1TB存储空间,任何文件类型 每月只需$10 查看我们的付费计划
如何从手机向电脑传输文件。4种免费方法 十月 19, 2022五月 24, 2021 作者 ǞǞǞ 在这篇文章中,我们将介绍如何 转移文件 从手机到电脑。我们将介绍4种方法,即:。使用USB电缆传输文件用SD卡传输文件以无线方式传输文件使用基于云的解决方案传输文件 免费传输文件达5GB 不需要注册 现在传输文件 简介 现在,我们几乎什么都用手机。 拍照、录像、存储重要文件、社交媒体、播放音乐,你都知道。我们中的一些人甚至用它来呼叫另一个人。由于对手机这种具有多种用途的小工具的依赖,你最终会在你的手机上存储许多文件。但是,当你不得不这样做时,你会怎么做呢? 发送文件 从你的手机到你的电脑?无论你的手机有多大的存储容量,最终你都要把文件从手机传输到电脑。让我们来看看从手机向PC或Mac发送文件的四种传输方法。 1.如何使用USB线从手机向电脑传输文件? 到目前为止,USB电缆传输是许多人的首选方法。为什么不呢? 只需将你的手机连接到你的电脑。再经过几个步骤的设置,就可以了! 现在你既可以通过你的任何一个设备发送和接收文件。 1.1 从手机向Windows PC发送文件 如何使用USB线将文件从安卓系统传输到电脑? 让我们看看如何将文件从安卓手机或iPhone转移到在Windows上运行的电脑。 1. 将你的手机通过USB线插入你的电脑。 2. 你会在通知栏中看到一条关于USB连接的信息。请确保它被设置为''转移文件'。 模式。3.现在双击 "我的电脑",你会看到你的手机出现在 "设备和驱动程序 "下。4.现在你可以将文件从你的手机移动到你的电脑上的文件夹。 如何使用USB线将文件从iPhone传输到电脑? 对于iPhone,你必须付出更多努力。 1.首先,确保你的Windows电脑上安装了最新版本的iTunes。 2.使用闪电到USB电缆将你的iPhone连接到你的电脑。3.在你的Windows设备上打开iTunes应用程序。进入屏幕的左上角,在那里你会看到' '字样。设备'。 标签。点击它,然后点击'下一个'。 关于文件共享。4.选择你的目标应用程序。iTunes将让你选择这些应用程序的哪些文件可以发送到你的电脑。 5.选择你的文件后,点击 '保存到'。,开始将你的数据传输到你的电脑。全部完成! 1.2 将文件从智能手机转移到Mac上 如何使用USB线将文件从安卓手机传输到Mac? 这绝对不像在安卓和Windows设备之间转移文件那样直接。但是,仍然没有什么太复杂的。1.第一步是安装 安卓文件传输 应用在你的Mac上。该应用程序应该运行并自行安装。2.现在只要用USB线将你的手机插入你的苹果设备。 3.随意浏览手机中的内容,并将其转移到Mac上的所需文件夹。 如何使用USB线将文件从iPhone传输到Mac? 按照这些步骤,将文件从iPhone发送到Mac。1.使用Lightning转USB线连接你的两台苹果设备。2.iTunes应用程序将默认打开。如果没有,那么你必须自己启动该应用程序。3.在左上角,点击iPhone的图标。这将打开一个新的窗口。 4.在这里的底部,你会发现关于你的设备存储的信息。你会看到音频文件、照片和视频、应用程序、文档和其他项目的部分。 5.点击相关部分,开始从你的iPhone向Mac发送文件。 1.3 使用USB电缆传输文件的优点和缺点 优点 弊端 它快速、简单,而且每次都不会失败。 你需要在你的电脑附近,或最多在你的USB电缆允许的范围内。 通过USB文件传输,你不需要互联网连接。 你不需要花很多钱,因为USB电缆相当便宜。 2.如何用SD卡将文件从智能手机转移到电脑上? 它们可能很小,但SD卡确实很强大。它们在单个芯片上携带64MB到1TB的数据。就像USB电缆一样,SD卡是一种广泛使用的数据传输手段。要使这种方法为你所用,你只需要在你的电脑设备上有一个SD卡插槽。 2.1 如何使用SD卡从安卓手机传输文件到Windows PC或Mac? 如果你的安卓手机将所有的文件存储在你的micro-SD卡上,那么传输文件将很容易。 遵循这些步骤。 1. 如果你有文件保存在手机内存中,你首先要在手机中放一个SD,并将相关文件转移到SD卡上。2. 从你的手机中取出micro-SD卡,并将其放在读卡器中。3. 将读卡器插入计算机设备的存储卡插槽。 4. 现在你只需从你的卡上复制粘贴文件到你的PC或Mac。是的,就是这么简单。 2.2 如何使用SD卡将文件从iPhone转移到Windows和Mac电脑? iPhone没有SD卡插槽。因此,将文件从iPhone转移到电脑上不会那么快。要开始这个过程,你还需要一个额外的工具,即闪电到SD卡适配器。 1. 将Lighting端口连接到你的iPhone后,将存储卡插入读卡器。 2. 前往你想传输的文件。例如,你想发送一张照片到你的电脑。3. 选择项目并按下分享的选项。 4. 接下来,点击 保存到文件.这时你的手机会向你显示可用的选项。选择你的SD卡,它大多显示为 没有名字. 5. 从那里,选择你希望存储文件的文件夹。6. 要完成传输,在SD卡上保存文件后弹出你的SD卡。把它插入你的桌面或笔记本电脑设备。现在你将能够从卡上拖放文件到你的设备上。 2.3 使用SD卡进行文件传输的优点和缺点 优点 弊端 对于带有微型SD卡插槽的安卓设备,这种方法是一个巨大的时间节省者。 可能不是iPhone用户的理想方法,因为你将不得不购买一个Lightning到SD卡的适配器。 它很容易操作,你可以在几分钟内传输大文件。 这一过程是缓慢的,涉及许多步骤。 3.如何以无线方式从手机向电脑发送文件? 如果你觉得使用有线连接来发送和接收文件已经过时了,那么为什么不给无线传输一个机会呢? 你可以通过使用蓝牙或Wi-Fi将文件从手机传输到电脑,避免使用电缆或SD卡的麻烦。让我们来看看如何。 3.1 如何使用蓝牙从手机向电脑发送文件? 使用蓝牙从安卓手机向Windows电脑发送文件 1. 进入你手机的设置,点击蓝牙。打开它,确保它能被附近的设备发现。2. 在你的Windows电脑上,进入开始菜单,点击左侧的轮子,进入设置。在搜索栏中输入蓝牙,当它出现在下拉菜单中时,点击该选项。3. 在窗口的右侧,你会看到一个通过蓝牙发送或接收文件的选项。点击它,打开文件传输向导。 4. 选择 接收文件 在从可用设备列表中选择你的移动设备之前,先选择你的移动设备。然后,选择 下一页.5. 同时,解锁你的手机,长按选择你想传输的任何文件。在设置中,按 分享 然后选择蓝牙。 6. 从手机上的 "可用设备 "列表中选择你的电脑。7. 在你的电脑上,选择你喜欢的文件夹来保存收到的文件后,点击完成。这就完成了交易。 使用蓝牙从安卓手机向Mac发送文件 1. 在你的安卓手机上打开蓝牙,并将其设置为可发现。 2. 在你的Mac上,通过设置进入首选项中的蓝牙,并将其打开。 3. 当你看到你的Mac出现在附近的可用设备中时,点击手机上的配对。4. 现在回到Mac上。从 "偏好 "窗口,点击 "共享"。勾选蓝牙共享旁边的方框。选择你的输出途径,现在你可以开始分享了。当你通过安卓系统发送你的文件时,你的Mac上会弹出一个通知。当你点击接受时,你的文件将直接进入指定的文件夹。 3.2 如何使用Apple Airdrop将文件从iPhone传输到Mac? 虽然你的iPhone不能用蓝牙发送文件,但它的武器库里还有别的东西。 Airdrop是一个只为苹果设备制作的特殊独家功能。这使得在设备之间共享文件的感觉就像没事一样。此外,它在蓝牙和Wi-Fi上都能工作。 按照这些方便的步骤,用Airdrop进行文件共享。1.在iPhone的控制中心,按Airdrop图标来打开它。2.进入你的应用程序,从那里你必须分享文件。例如,要分享照片,选择所有你想发送的图片到你的Mac。 3.现在,点击手机屏幕底部出现的排在第一位的共享按钮。从显示的设备中选择你的Mac。就这样了。 真的是那么简单 3.3 如何在没有互联网的情况下使用Wi-Fi将文件从智能手机传输到电脑? 使用Wi-Fi路由器从安卓手机或iPhone接收文件到窗口电脑 有一个Wi-Fi路由器吗? 很好!现在你可以开始在设备之间发送和接收文件了。但在你走之前,你将需要在你的安卓或iOS手机上安装任何第三方FTP应用程序,使事情顺利进行。而由于Windows不支持airdrop,你无法使用蓝牙将文件从iPhone发送到Windows电脑上。这就是为什么你可以使用这个相同的方法从你的iPhone分享文件到有无线连接的PC。对于这一点。 1.进入你手机上的互联网设置。 2.在Hotspot & tethering设置中找到Wi-Fi热点功能,并简单地将其打开。 3.打开FTP应用程序,将显示一个URL。4.在你的电脑上,进入我的电脑。 5.在顶部的地址栏中,输入手机应用程序的URL。你的安卓存储现在将在你的电脑上可见。 使用Wi-Fi路由器将文件从你的安卓手机传输到Mac上 实际上,你可以在你的Mac上使用同样的FTP存储共享方法。但你需要在你的电脑上也安装一个支持FTP的应用程序。 从你的安卓系统复制URL,并将其粘贴到你的Mac上的FTP应用程序。而你将在短时间内开始在屏幕上看到你的手机存储。 3.4 使用无线方式发送文件的优点和缺点 优点 弊端 不需要再为电线而烦恼。只需轻点几下就能连接到任何设备。 你不能用蓝牙在iPhone和Windows PC之间分享文件。 你可以同时连接到多个设备。 无线传输永远不会像有线连接那样快。 Airdrop使文件共享非常容易和方便。 你将需要在你的手机上安装一个FTP应用程序。 Airdrop对安卓和支持Windows的设备不起作用。 Airdrop需要同时启用Wi-Fi和蓝牙。 发送和接收设备都需要在同一个Wi-Fi网络上,因此它们之间的距离是有限的。 4.如何使用基于云的供应商将文件从你的手机分享到电脑上 如果你能访问互联网,那么请忘记所有其他的文件共享方法。因为你可以用最有效的方式来传输文件。 我们正在谈论基于云的文件共享。它超级简单,甚至你的祖母也可以使用它。以下是它的工作原理。1.在你的设备(手机和电脑)上下载相关的基于云的共享和存储应用程序。一些流行的包括谷歌驱动器、iCloud、微软OneDrive和Dropbox。2.把你想分享的任何文件放在你的云端应用文件夹里。在你的手机和电脑上设置为自动同步。3.现在,你可以随时随地与任何人分享文件。超级简单,对吗? 4.1 使用无线方式分享文件的优点和缺点 优点 弊端 它是未来的文件共享方法。许多设备已经使用基于云的文件存储和共享方法。谷歌Pixel手机就是一个流行的例子。 没有互联网?没有云共享。 云服务器上的每个文件都有一个独特的URL。你可以与任何人分享,他们可以从全球任何地方访问该链接。 可悲的是,如果没有可靠的互联网连接,你就无法发送或接收文件。此外,这些服务可能还需要你购买额外的存储空间。 通过一些基于云的解决方案,你的发送量是没有限制的。你可能会用完空间,但你总是可以购买更多。 不幸的是,有一些基于云的服务提供商不允许你发送非常大的文件。 用Filemail轻松地将文件从你的手机传输到你的电脑 文件邮件 是一个基于云的解决方案,让你可以将文件发送给你想要的人。通过我们的网站或多平台应用程序,你可以在任何平台上发送和接收文件--无论是你的PC、Mac、Android还是iPhone。你所需要做的,就是附上你的目标文件,输入收件人的电子邮件地址,然后点击发送。不用再看没完没了的教程视频来搞清楚上传过程。你发送文件,你的目标收件人在他们的电子邮件中得到链接。没有冗长的注册,也不需要分享个人的详细资料。Filemail让你传输任何东西,同时确保你的数据的安全和保密。 因此,现在就在你的手机上下载Filemail,将文件、音乐、照片、视频等发送到你的Windows或Mac电脑。 而这里有一个问题。它是免费的!好吧,这并不是一个真正的陷阱。问题是我们的免费服务没有我们的付费计划那么全面。 免费分享高达5GB的文件。 分享任何大小的文件,获得1TB的存储空间及更多 每月仅从$15起 查看我们的付费计划